Batting Simulator
ECE4760 Spring 2025
Natalia Pope, Nathan Rahklin, Daria Kot
Demonstration Video
Introduction
A fully functional batting simulator featuring 3D vector graphics, realistic pitching trajectories, and challenging batting mechanics. Use a joystick to position your bat and a button to time your swing! Perfect timing is rewarded with increased bat power.
High Level Design
Our project idea was inspired by our team's love for baseball and for video games. This project requires physics for the bat collision with the ball but uses an algorithm to model the pitch. This design uses hardware for the inputs of the game: the joystick and button. It also uses PWM combined with an analog filter rather than using the DAC output for ease of completion. All of the VGA graphics were completed in the software. We organized our code into 5 parts: Batting, Pitching, VGA Graphics, Game Logic, and Audio.
Hardware Design
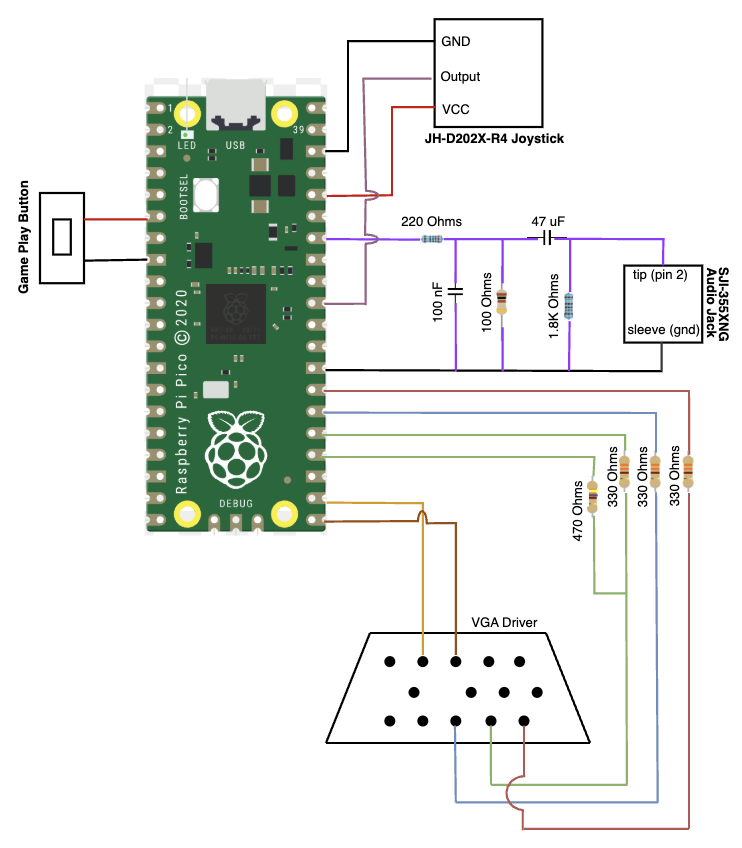
The hardware required to run the Batting Simulator includes a VGA Driver, a DAC, a joystick, and a button. The electrical schematic can be found below.
Electrical Design
Joystick
The joystick is used to control the bats height, it has 2 10K Ohm potentiometers: one for the x axis and 1 for the y axis. Because the timing of the swing is dependent on the release of the button, only the y axis of the joystick needed to be wired to the RP2040 to control the vertical position. To limit noise, we kept the wires as short as possible.
Button
The button is used to control the timing and power of the swing. The button was wired from the RP2040 ground directly to a GPIO pin, making our button pull down. When pressed, the input to the PWM is low. Again, to limit noise, we kept the wires as short as possible.
Audio
To control the audio, we elected to use the built in PWM Audio. The PWM signal gets fed through an analog filter, which turns the digital signal into an AC-coupled analog signal in the audio frequency range. Once the signal is in the audio frequency range, it can be connected to the SJI355XNG Audio Jack to be played out of the speaker. Additionally, pwm was chosen over DMA audio due to the complexity our chosen song requires. "Take me out to the ballgame" is significantly more complex than the birdsongs implemented in class.
The audio jack is comprised of 3 different parts, which the SJI355XNG breaks out on to the breadboard. The 3 parts are comprised of: the sleeve, the tip, and the ring. The tip is the part at the very end of the jack, and is where the device gets the audio for the left microphone. The ring can be found in the middle of the sleeve and the tip, and is where the device gets the audio for the right microphone. The sleeve grounds the audio jack. In our design, we used the ground of the RP2040 to ground the audio jack, and arbitrarily elected to connect the tip to provide audio to the left microphone, but the right would have worked just as well.
Controller
Gaming Controller
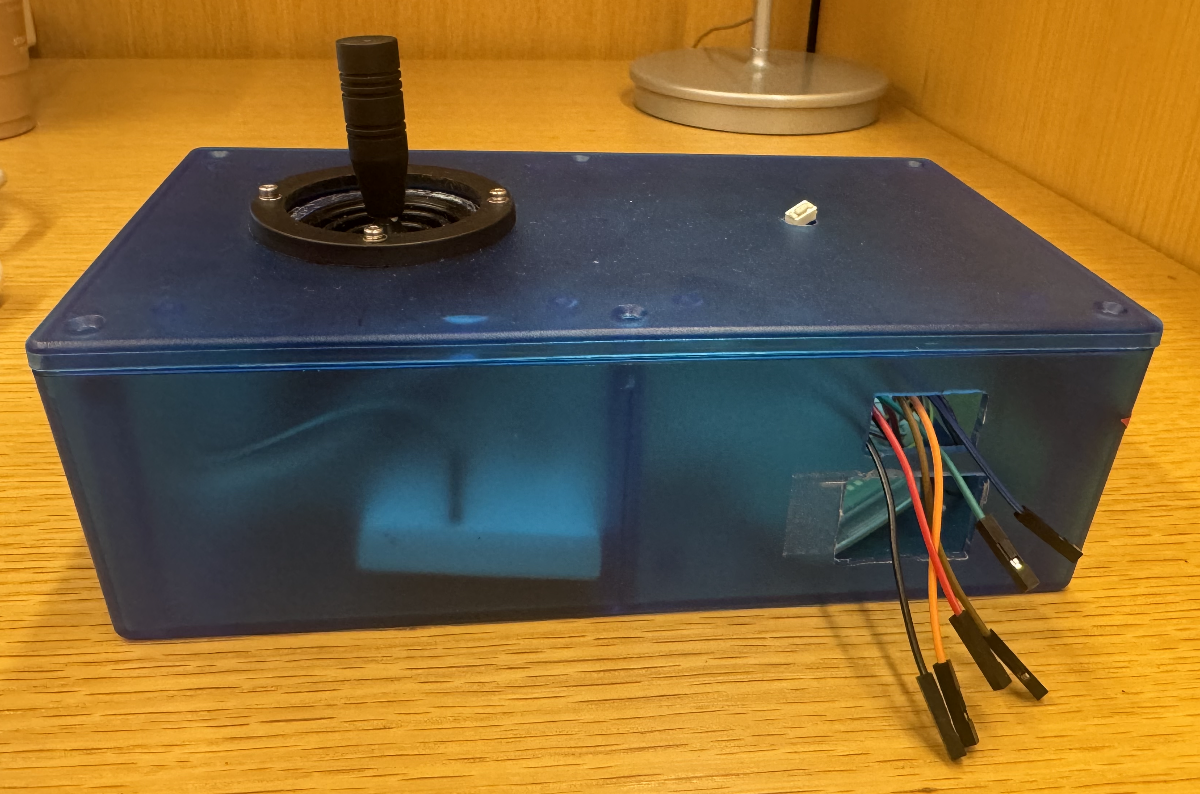
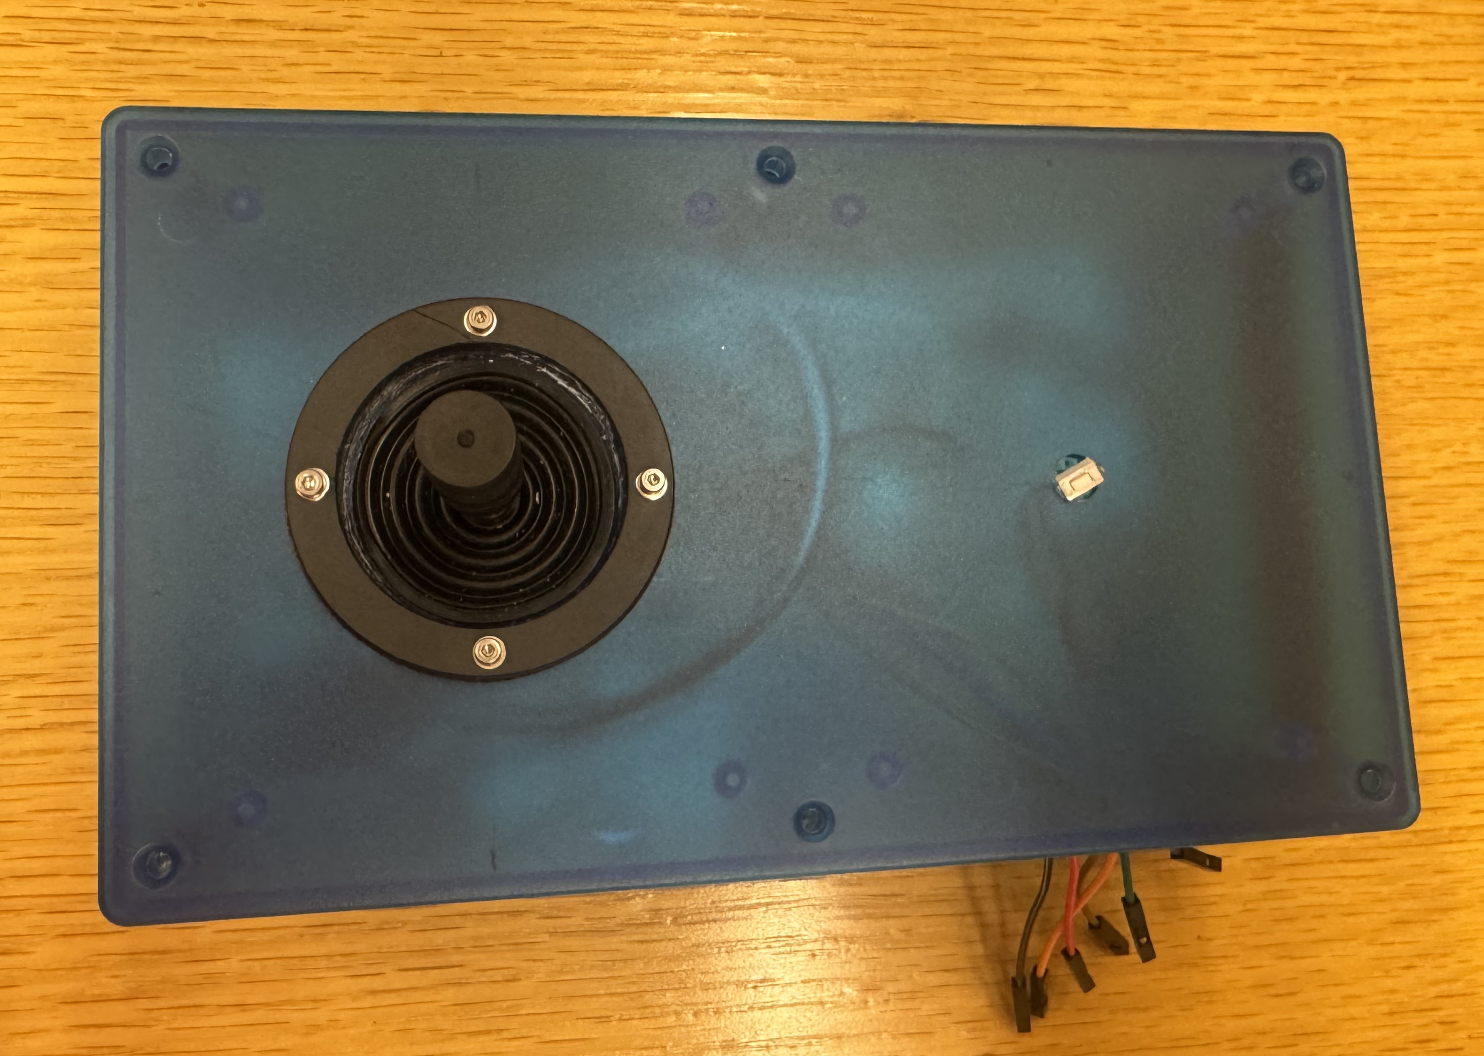
To make the hardware of the game feel more like a commercial grade video game, we used a box to encapsulate all internal wires. This made it easier for the user to utilize the joystick and the button at the same time as they can use just one hand to do both. To place the joystick both the Joystick and button, we first measured the hardware, traced a hole, and used a drill to create a hole in a plastic box to ensure that the devices would fit snug in the holes to make it easier. When designing the controller, we chose to make it right hand dominant. We elected that the joystick would be controlled by the player's right hand and the button by the players left.
A hole was strategicically cut in the plastic to allow the VGA driver wires to come out as well as the power cord for the RP2040.
Program Design
Our Program design is composed of 5 parts: Pitching, Batting, 3D Graphics, Game Play Logic, and Audio.
Pitching

Pitching Algorithm
Pitchers are famous for their ability to throw balls fast with wild curves. In real life, pitchers create these curves by spinning the ball with high RPM. The physics of baseball pitches are extremely complex. In the interest of programmability, it was determined that pitches would be modeled using a function. Thus, a function that takes in a timestamp and returns a position in real world space was created in collaboration with the TA Mahmoud Elsharawy (Pitching Algorithm figure). A desmos animation of this function can be found in the appendix [3] and below. Taking inspiration from mechanics classes, a unique version of this function is used for the ball’s x and y velocities. In the interest of simplicity, the ball’s z velocity is made constant. This picewise function used a number of parameters to tune various aspects of the pitch’s curve:
Changing Paramater Values: a, h, n, g
a = Maximum pitch amplitude
d = Pitch end position (z-direction)
h = Pitch x or y position at position z = d
n = Z position of maximum amplitude
g = Initial pitch release height
A pitch is initialized with the init_pitch() function. This function sets random a, h, n, and g parameters for the balls x and y directions as well as a random z velocity. The d parameter is a constant equal to the mound_to_plate constant (19.395 meters). To randomize these parameters, the stlib.h function rand() is used. The rand() output is divided by the macro RAND_MAX to normalize it and is then scaled by macros for the maximum and minimum values of each paremeter. Finally, these parameters are saved in the x_parameter or y_parameter global variables respectively and the ball’s x, y, and z positions are saved in the ball_position global variables.
An interesting bug was found during the update_pitch() implementation. Originally, the time since pitch release was used as the model_pitch() time argument. This lead to the ball not following its full trajectory as prescribed by the desmos function. Some reflection lead to the realization that the units used in the demsos function actually corresponded with the ball’s z position. One final debugging session revealed that the desmos function takes in z positions from 0 to d while the game functions from d to 0 (home plate is position z = 0). Thus, inputting ball_vz * time into the model_pitcrh() function and then updating ball_z position with mound_to_plate - ball_vz * time correctly modeled pitches.
All pitching variables are floats as it was not found that computation optimization was necessary.
Batting
Early Swing
Late Swing
Bat Position Registering and Animation
Both in real life and in our video game, three key metrics drive a successful bat: positioning, timing, and power. On a high level, batting works as follows:
From our original goals, we were able to accomplish the following:
1. A player uses the joystick to move the bat up and down.
2. Pressing and holding the button results in increasing, then decreasing power. This can be thought
of as winding up the bat.
3. Releasing the button locks in the power value, and the swing is initialized.
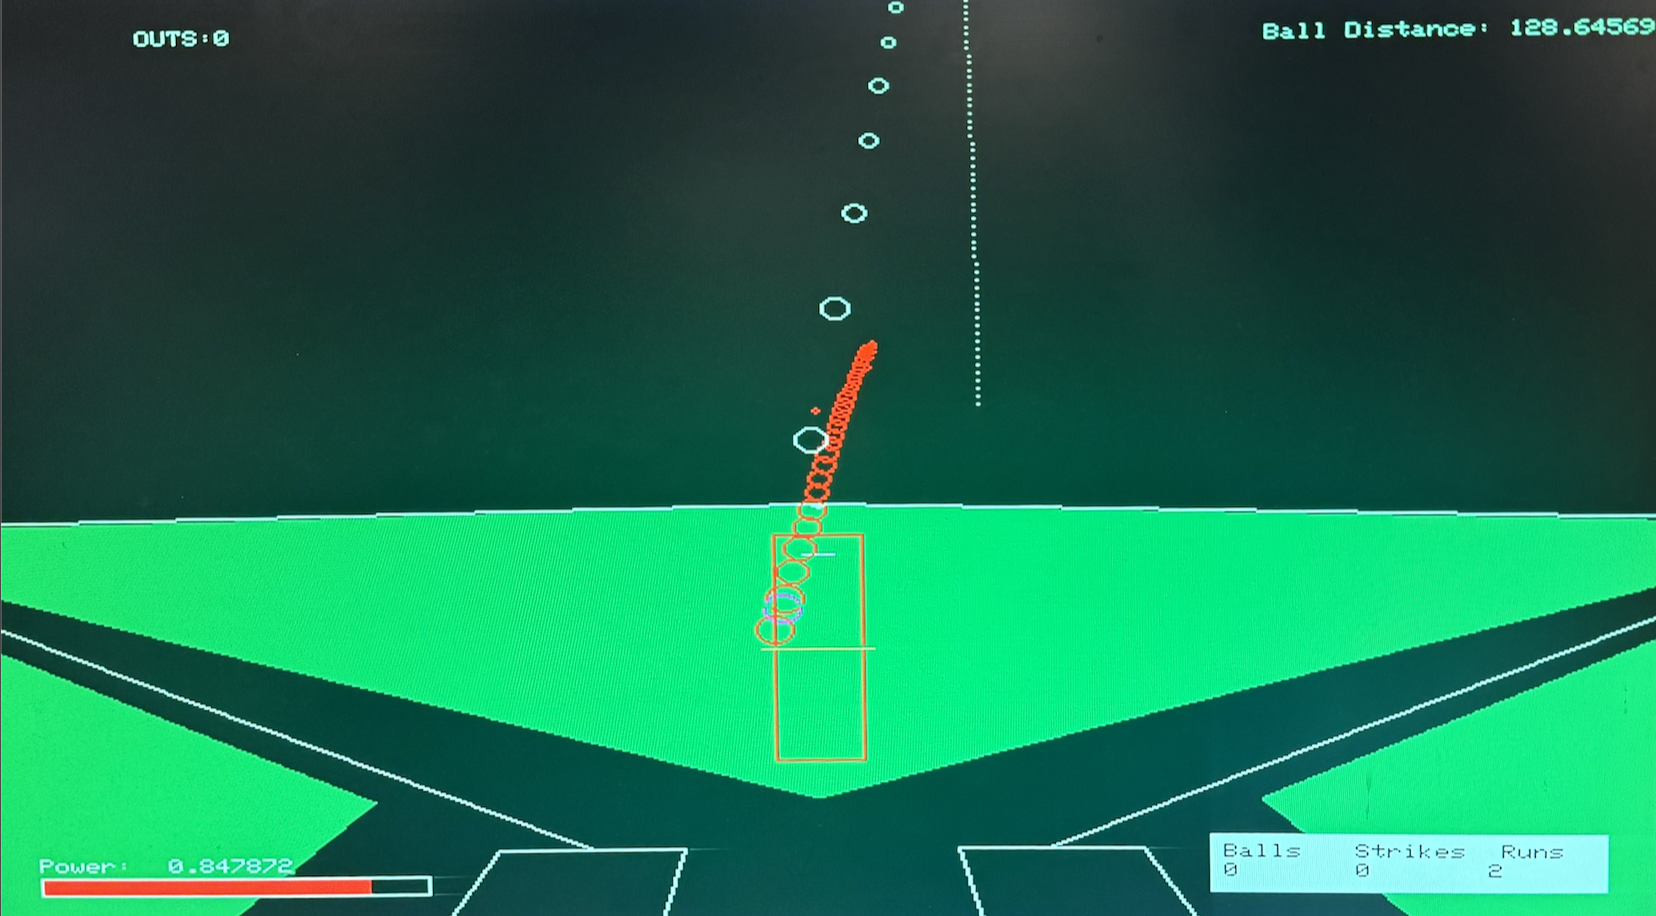
The bat position (determined by joystick position) is animated at all times. To do so, the drawBat() function is called, which animates both the bat and the batter's box. This function calls the get_bat_position() function which pulls the joysticks gpio value using the adc. This value is shifted (to high pass), normalized, and scaled by the height of the batters box. This ensures that the maximum joystick position corresponds to the top of the batter's box and that the minimum joystick position corresponds with the bottom of the box. This bat position (in world coordinates) is stored in the bat_position global float. The draw_bat() function is called once per animation frame.
Button Press Registering
Once the player presses the batting button to wind up their swing and generate power, an interrupt associated with the button’s falling edge state is called. This interrupt sets a holding_power_button boolean true, stores the time the button was pressed in the start_button_press variable, and sets an already_hit boolean true. The already_hit boolean prevents the player from being able to swing the bat multiple times for one pitch. The holding_power_button boolean guards the portion of code responsible for animating the power bar (seen in the bottom right corner of early and late swing figures).
Animating the power bar works as follows: The amount of time the button has been held is determined by subtracting start_button_press from the current time. This value is transformed into a value between 0 and 1. That transformed value then determines the width of the red rectangle to be drawn.
As the player watches the ball animate from the pitcher’s mound to the strike zone, they release the button to initiate their bat swing. This triggers an interrupt tied to the button’s rising edge. This interrupt sets the holding_power_button boolean to False, sets the bat_swung boolean to true, and captures the time the button was released into the release_button_press variable.
get_collision()
The main animation loop registers this bat_swung boolean and checks to see if the player successfully hit the baseball using the get_collision() function. The get_collision() function satisfies the goal of determining whether the player placed the bat in the correct location and if the player successfully timed their swing. Once both have been determined to be successful, the get_collision() function outputs the balls exit velocity in the x, y, and z directions.
To determine both the successful timing of the pitch and the exit angle between the z and x directions, the relative amount of time it takes for the ball and the bat to reach the plate is used. If it takes longer for the pitch to reach the z = 0 mark than the bat, then the batter swung early and the ball should go to the left. If the ball reaches the z = 0 mark before the bat, then the batter swung late and the ball should go to the right. If the difference in time between the ball and bat reaching the plate is sufficiently great, then the player missed the ball entirely. The miss threshold and amount of time it takes the ball to reach horizontal were determined to be 0.08 and 0.3 empirically.
To determine a positioning miss, the balls y position when it reaches the plate is compared to the bat’s active position. Essentially, it is checked whither the ball’s bottom edge is below the bat’s top edge and that the ball’s top edge is above the bat’s bottom edge. It is important to note that despite the bat being animated as 1 pixel thick, within game logic it is 20cm thick. This was done to make batting mechanics easier. A real life bat width 6.6cm width was prohibitively difficult.
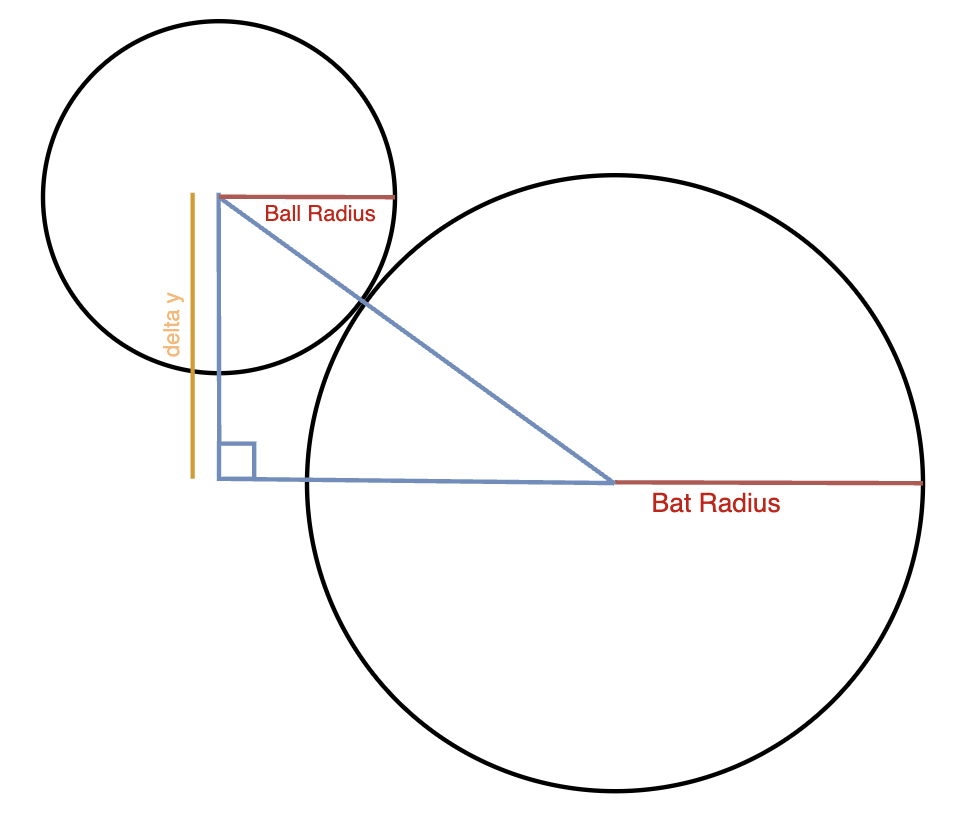
Ball and Bat Overlap Trigonometry
Once it is determined that the player successfully timed their swing and placed their bat in an acceptable position, the exit angles and velocity are calculated. The angle between the z and y axis is determined using trigonometry, as seen above. The angle between the z and x axis is determined using the difference in the amount of time it takes for the bat and ball to reach the z = 0 mark. This value, delta_t_ball, is normalized on the bat_miss_threshold as it can be no larger in magnitude than the bat_miss_threshold. This normalized value is scaled by the maximum_ball_angle, a value empirically set to 20 degrees. Finally, the exit velocity is determined using classical momentum equations (m1v1 + m2v2 = …) and is scaled by a scale factor empirically set to 3. Finally, if the angle between the z and y axes is greater than 45 degrees, the velocity value is scaled such that it is more likely for the player to be able to see the full ball flight.
Once this computation is completed, the number of strikes and balls are set to zero and the run counter is incremented. If the player missed the ball, the number of strikes is incremented.
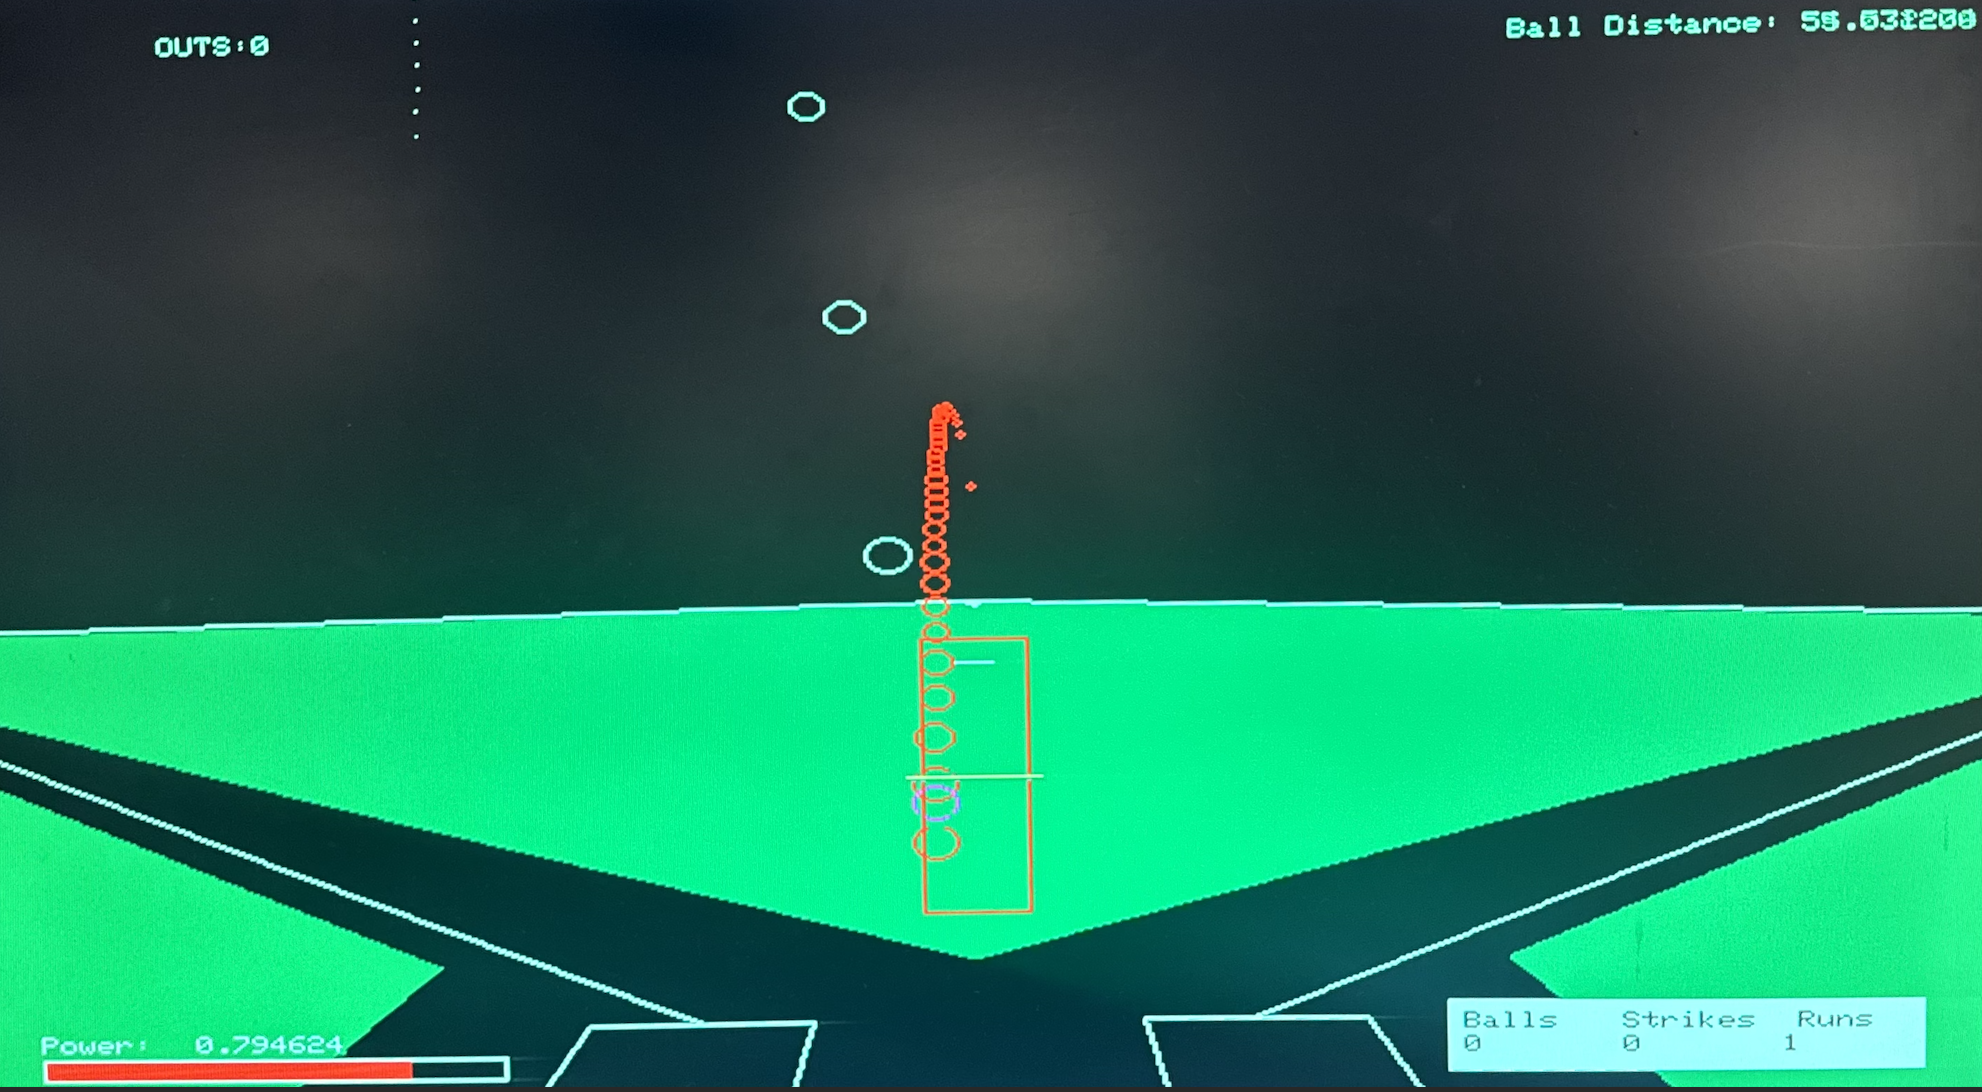
3D Graphics
The VGA graphics screen uses a 3D coordinate system where the +x axis points to the right, +y points downward, and +z extends into the screen. To display objects with perspective, we developed a function that projects real-world coordinates (in meters) onto 2D screen coordinates.
The function convert_to_vga(x, y, z) takes in 3D coordinates and performs a
perspective projection, simulating how distant objects appear smaller.
It uses a pinhole camera model centered at a fixed screen point
(center_x, center_y), and projects the real-world coordinates onto the VGA plane
using a scaling factor based on depth (z).
The key steps are:
- Depth adjustment: The input z-coordinate is shifted by
camera_to_plateto reflect the camera’s position relative to the field. - X projection: The x-position is scaled by the focal length
fand divided by(1 + z)to simulate diminishing size with distance. This projected x value is offset from the screen center. - Y projection: The y-position is offset by
camera_height, then scaled similarly, with an additionalscale_factorto adjust for screen aspect ratio or vertical compression. - Z scaling: The returned
vga_zisf / z, which serves as a scale factor for rendering objects—larger when closer, smaller when farther away.
Initially, the function did not include the camera_height or
camera_to_plate offsets. As a result, the field appeared flat and unnatural,
lacking depth and curvature.
By coincidence, an art major was in the lab during testing and suggested modifying the
projection to induce more of a fisheye effect.
Based on her feedback, we introduced a vertical offset (camera_height) and adjusted
the z-depth (camera_to_plate) to create a stronger sense of camera perspective and
curvature in the field.
These changes dramatically improved the visual realism and depth perception of the scene.
#define scale_factor 0.5
vgaPoint convert_to_vga(float x, float y, float z) {
    int center_x = 320;
    int center_y = 225;
    float f = 500; // Focal length in pixels

    z = z + camera_to_plate;

    vgaPoint point = {0, 0, 0.0};

    // Protect against divide-by-zero
    point.vga_x = center_x + (int)((x * f) / (1 + z));
    point.vga_y = center_y + (int)(((y - camera_height) * f) / ((1 + z) * scale_factor));
    point.vga_z = f / z;

    return point;
}
This function enables animations like the ball flying toward or away from the player. The field background is also generated using this projection logic, ensuring a consistent field of view. To render static elements like the field, we calculate VGA coordinates for real-world positions and draw lines between them.
You may also notice green filled quadrilaterals on the screen. To easily fill these shapes,
we created a helper function called fillQuad().
The fillQuad function fills convex quadrilaterals using scanline rasterization.
For each horizontal line (scanline) between the shape’s top and bottom edges, it calculates
intersection points with the quadrilateral’s edges. If two intersections are found, it draws a
horizontal line between them using the specified color.
This repeats for each scanline, effectively filling the shape.
Power Control
Power Button
The power button is controlled using an Interrupt Handler. When the button falls low, meaning it was pressed, the interrupt handler saves the current time of day. Once the button is pressed, the code continuously checks to see if button is low, and if so uses an intermediate value to hold the amount of time that has passed since the button was first pressed. This intermediate value is then used to calculate a power ratio of time held over 0.5 seconds. To enforce timing restraints on the user, if the player has held down the button for longer than 0.5 seconds, the power ratio is then calculated by the amount of time longer than .5 seconds that the user has held the button, with a minimum power of 0.2. This ratio is then sent to the updatePower() function to update the animation.
The updatePower() function animates the power bar by first converting the current power
level (a float between 0 and 1) into a string for display.
It then updates the numerical value on screen and redraws the power bar by clearing the previous bar
and filling a red rectangle proportional to the power level.
This creates a smooth, responsive visual indicator of how much power the user has charged.
Game Play Logic
To take the physics and the VGA graphics and turn it into an actual game, we needed to add game logic. This included creating global booleans that kept track of whether or not the player was playing the game, a global counter to keep track of the number of strikes, a global counter to keep track of the number of outs, and a global counter to keep track of the number of balls.
Starting the Game
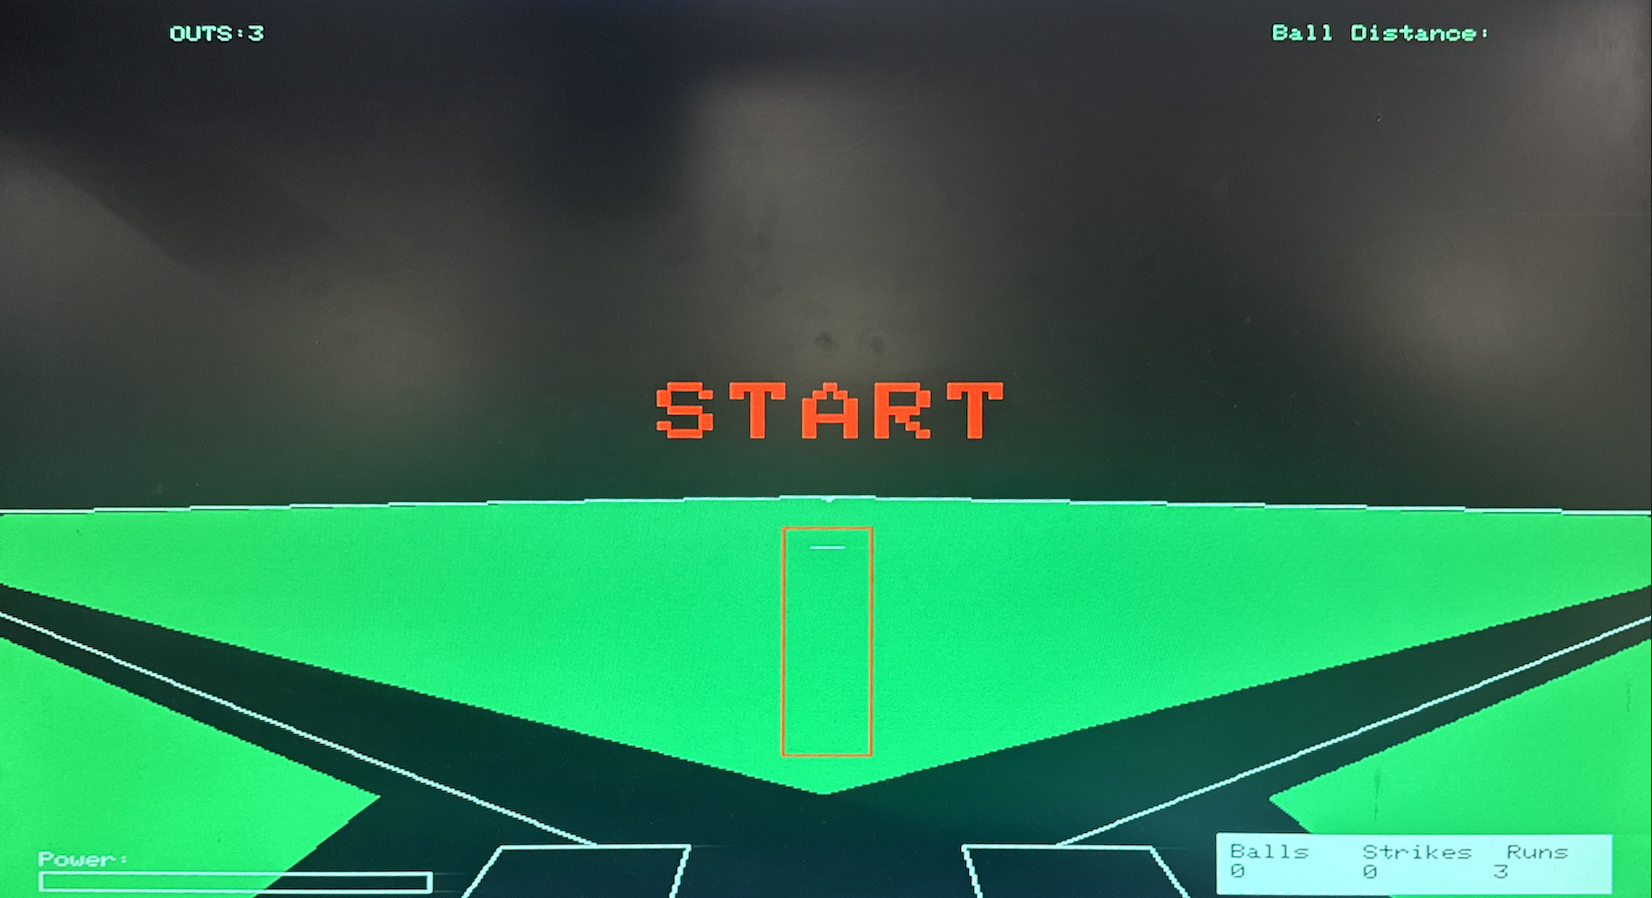
Start Screen
Upon starting the game, the player is greeted with the start screen. Pressing the button triggers the GPIO callback falling function as the button is pulled high until pressed. In the GPIO callback function, the program first checks to see if the player is already playing. If the user is not already playing, the global boolean playing is set to True and the game begins.
Counting Runs
To keep the game simple, we maintained a global integer counter for the number of runs that the player has hit. This number is incrememented whenever the player makes contact with the ball, no matter how far it goes.
Counting Strikes
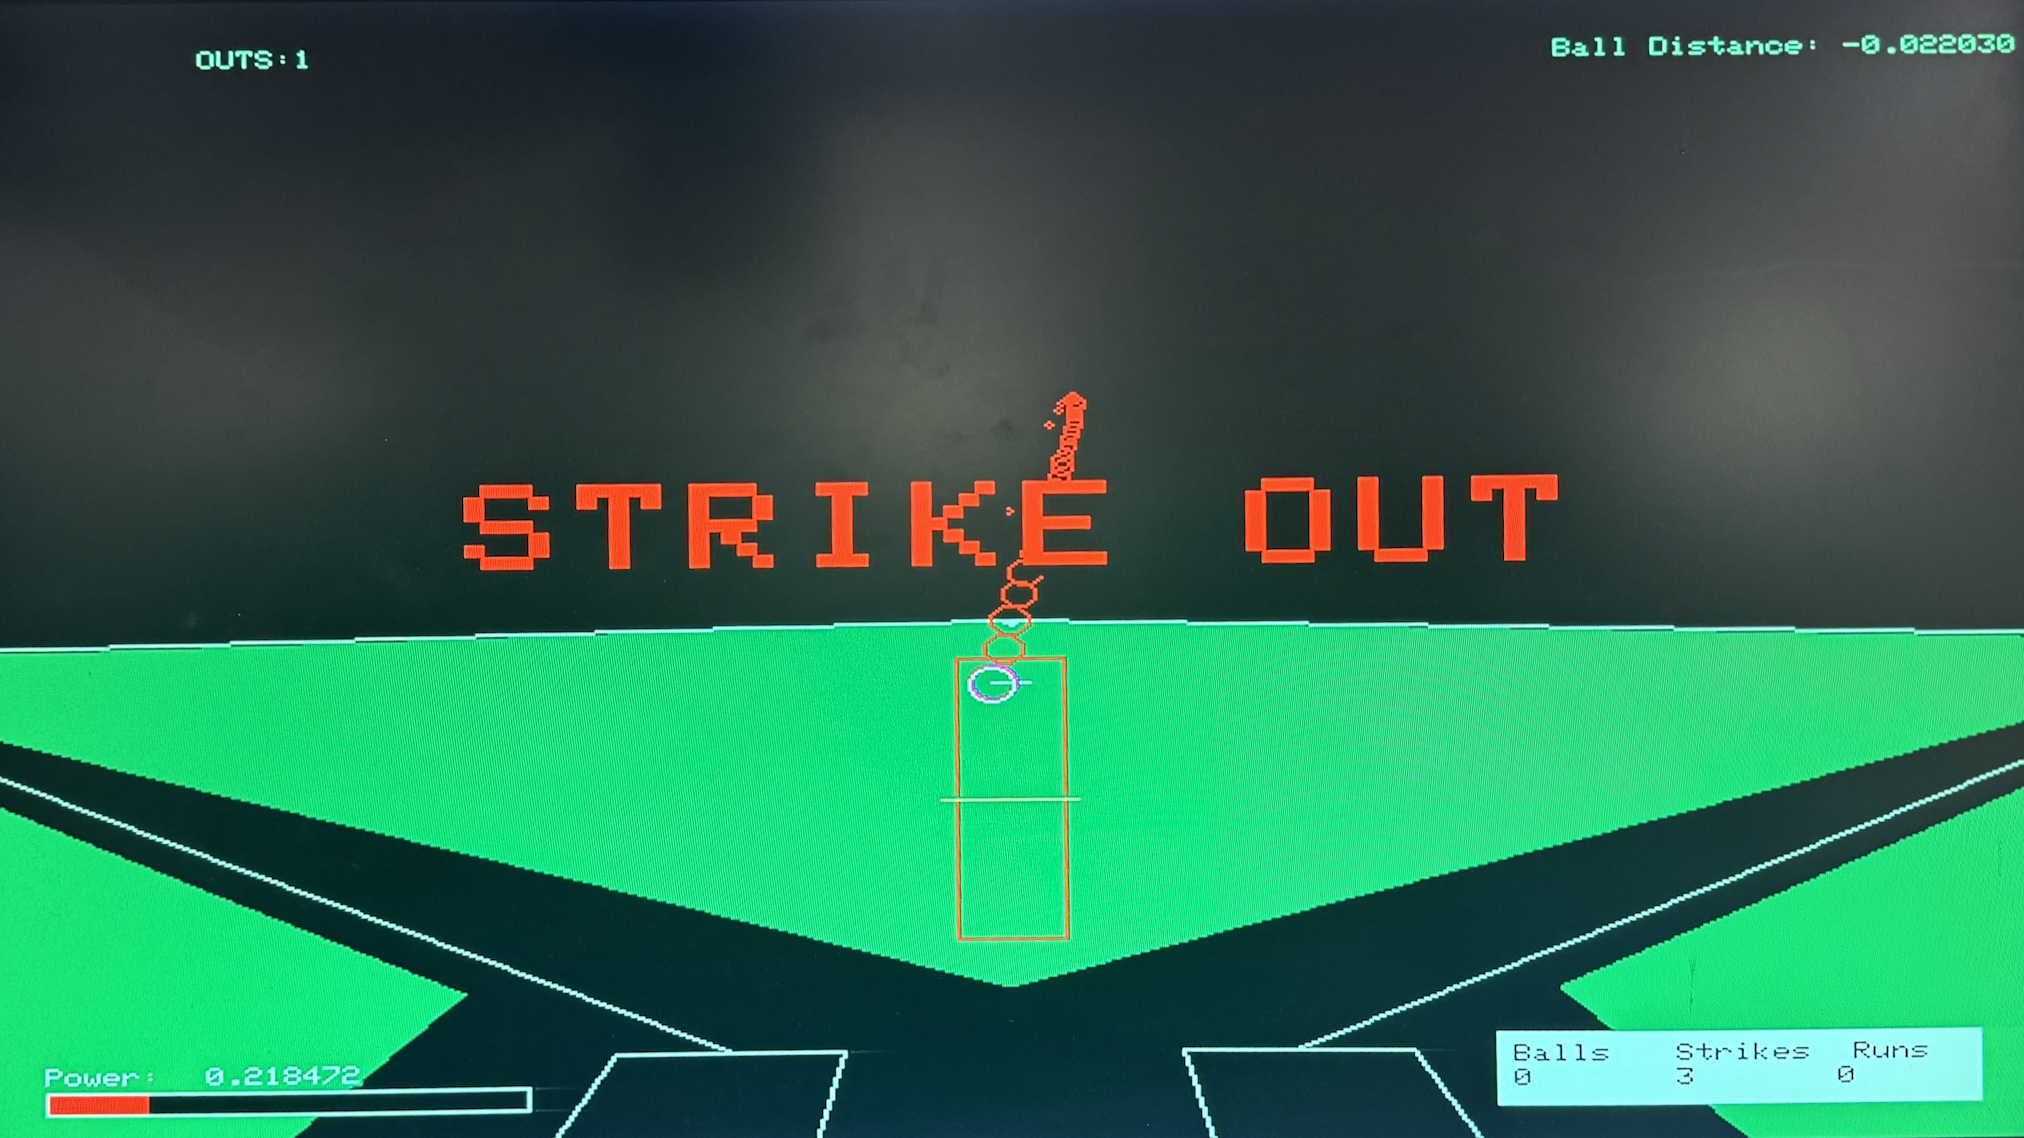
Strike Out Screen
In baseball, a strike out is composed of 3 pitches that are inside of the batters box but the batter does not hit. To keep track of the number of strikes, we instantiated a global integer that was added to whenever batter swung at a pitch and missed or whenever the batter did not swing at a pitch and it landed in the batters box. In baseball, if the batter swings and misses the ball, even if the pitcher misses the batters box, it counts as a strike. Once the user gets to 3 strikes, they are out. This triggers the increment the global integer out counter and the strike out screen, which displays for 1 second upon strike out. The global strike counter is reset back to zero when the player is struck out.
Counting Balls
In correspondance with the rules of baseball, the pitcher is punished upon throwing 4 balls by allowing the batter to walk to first base. To ensure our game mimiced this same punishment for our randomized pitching algorithm, we instantiated a global integer counter to track the number of balls the pitcher has thrown that the player has not swung at. Once the pitcher reaches 4 balls, the player is awarded a run. The global integer ball counter is then reset back to zero. This value is also reset upon strike out to mimic the changing of players in a real baseball game who do not get to keep the balls awared to another player.
Counting Outs
A baseball inning is over when the team has achieved 3 outs. We elected to keep this as the number of outs that a player can achieve before the game is over. Similar to strikes, balls, and runs, the number of outs is maintained using a global integer counter. It is incremented when a player gets 3 strikes. Upon 3 outs, the Game Over screen is displayed, as shown below.
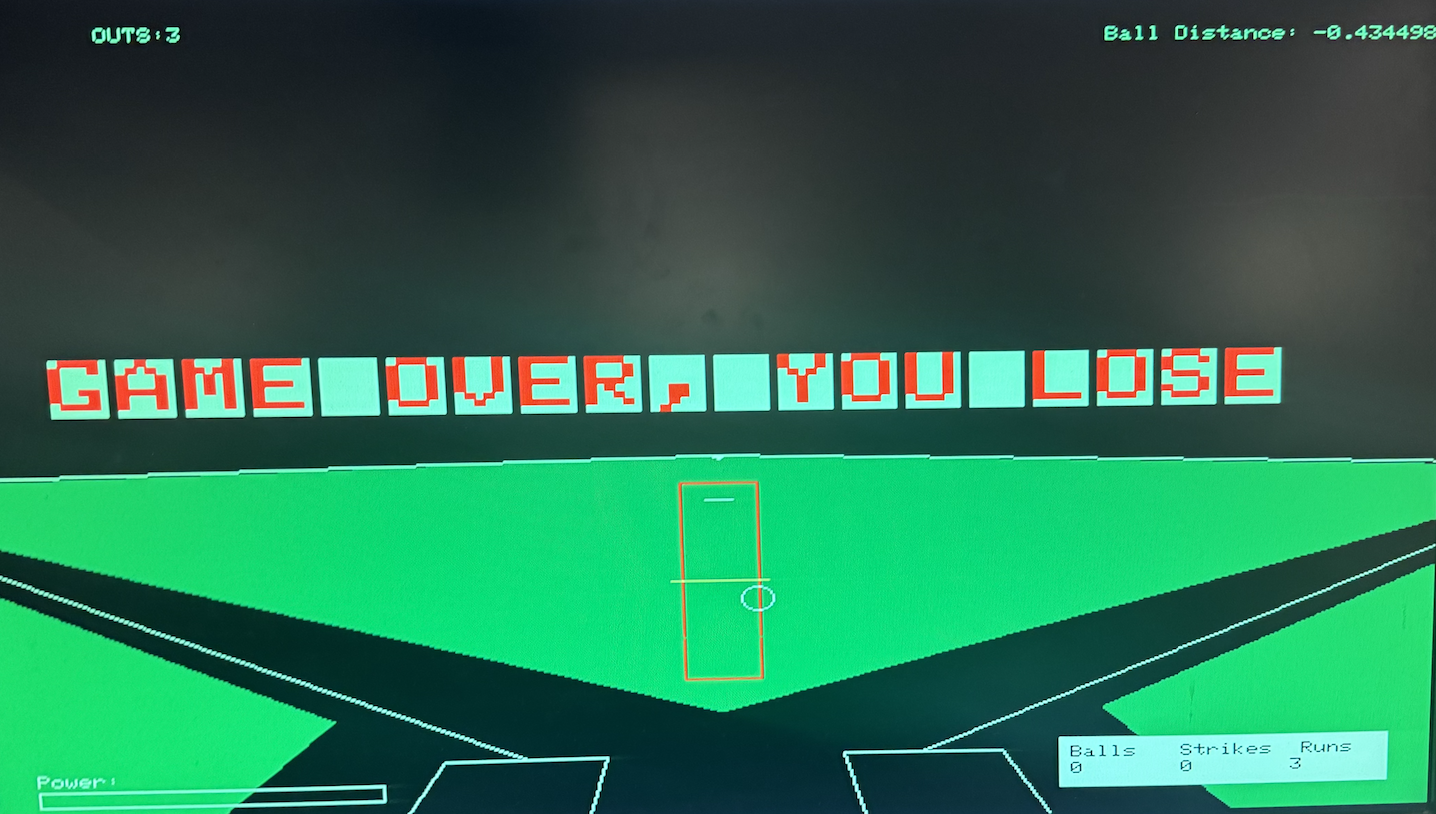
Game Over Screen
This screen is held for 2 seconds, and then the start screen is returned to. The number of runs that the player scored during the game is not reset until the player presses the button to start again. This was a design decision chosen to make it easier for the user to know what their final score was. The number of strikes and outs are reset upon the ending of the game.
Audio
The audio is controlled by PWM signals. To create the PWM signal, we used a Jupiter Notebook file we found online to convert the Take me out to the Ball Game wav file into a file that will be read into PWM signals [1]. Due to the limited memory on the RP2040, we restrained the number samples to be played to 100,000 samples. The PWM frequency values outputted from the Jupyter Notebook were then copied and pasted into a header file for easy access by the program.
To set up the PWM, we first set the PWM inputs to the defualt. To ensure the audio was nonblocking in our program, we use Interrupt Request Handling for the audio. We then used clk divide to set the interrupt rate. The base clock of the RP2040 is 176,000,000 Hz, which is then wrapped by 240. By further dividing it by 6.0f, we were able to achieve an upbeat faster tone that we wanted to put a good vibe to our game at about 15 KHz. In the Interrupt Handler, we check to make sure we are not at the end of the PWM values, and if we are we restart. This ensures that our game has audio running on a loop. The actual conversion of the PWM output signals to audible signal is handled using the hardware, making the software less complicated.
Results
From our original goals, we were able to accomplish:
1. Random Pitches
2. User times bat using a button
3. Joystick functionality
4. Ball's flight modeled using physics
5. Visually aesthetic and realistic graphics
6. Background track
From our original goals, we were unable to implement:
1. Pitching mode
2. Stick Figure Animation
Our final implementation was evaluated for performance, accuracy, safety, and usability.
- Execution Speed: The system responded with minimal hesitation or flicker during real-time interactions. VGA rendering and audio playback ran concurrently without noticeable lag, ensuring smooth animation and responsive controls.
- Accuracy: Numerical values such as ball velocity and power level were displayed with reliable precision. VGA timing was stable with no observable visual artifacts.
- Test Data: Internal test values such as joystick input, power calculations, and object positions were monitored to ensure consistent operation across different states of gameplay.
- Safety Enforcement: Software bounds checking was used to prevent overflow or invalid inputs (e.g., joystick values and power limits), and hardware pins were protected with current-limiting resistors to safeguard the board and peripherals.
- Usability: The system was tested by multiple users and was found to be intuitive and stable. The joystick offered smooth control of the bat, and the animated power bar gave clear visual feedback, making the interface easy to learn and operate.
Conclusion
Conclusion
Overall, our design met and in some areas exceeded expectations. The simulator was highly interactive and responsive, with accurate VGA rendering and audio output that aligned well with our initial goals for user experience and system performance. If we were to redesign the project in the future, it would be exciting to implement a dynamic camera that follows the ball after it is hit. Additionally, adding a menu to select difficulty levels or choose between different game modes would significantly improve replayability and user customization. We did not use any proprietary or Altera IP, nor did we sign NDAs or utilize restricted components. Some utility functions were adapted from publicly available resources or course-provided starter code, all of which were properly cited. No reverse engineering was involved, and we avoided any use of patented or trademarked materials. The graphics and layout of the field were loosely based on the visual style and perspective found in MLB The Show 24. Although the project was educational, elements such as the 3D rendering system or interaction model could potentially be developed into patentable innovations with further refinement.
Work Distribution

Team Picture
Nathan
npr29@cornell.edu
Batting and Pitching
Natalia
nlp52@cornell.edu
Game play, Hardware and 3D Graphics
Daria
dak267@cornell.edu
Hardware and 3D Graphics
Appendix A
- The group approves this report for inclusion on the course website.
- The group approves the video for inclusion on the course youtube channel.