Project Introduction
A retro‐inspired, Super Mario–style side-scroller built on a Raspberry Pi Pico. We designed and built a mini gaming console around the Raspberry Pi Pico to re-create the look and feel of an the original Super Mario Bros. We recreated the entire game from scratch using methods from the first three lab assignments. We heavy relied upon lab 2 (Galton Board) as the base for our game, as it was physics- and animation- heavy. We ended up with a nearly spot-on recreation of the original game, with some considerations for the restrictions of the provided color palette, and some non-essential features cut due to time and resource constraints.
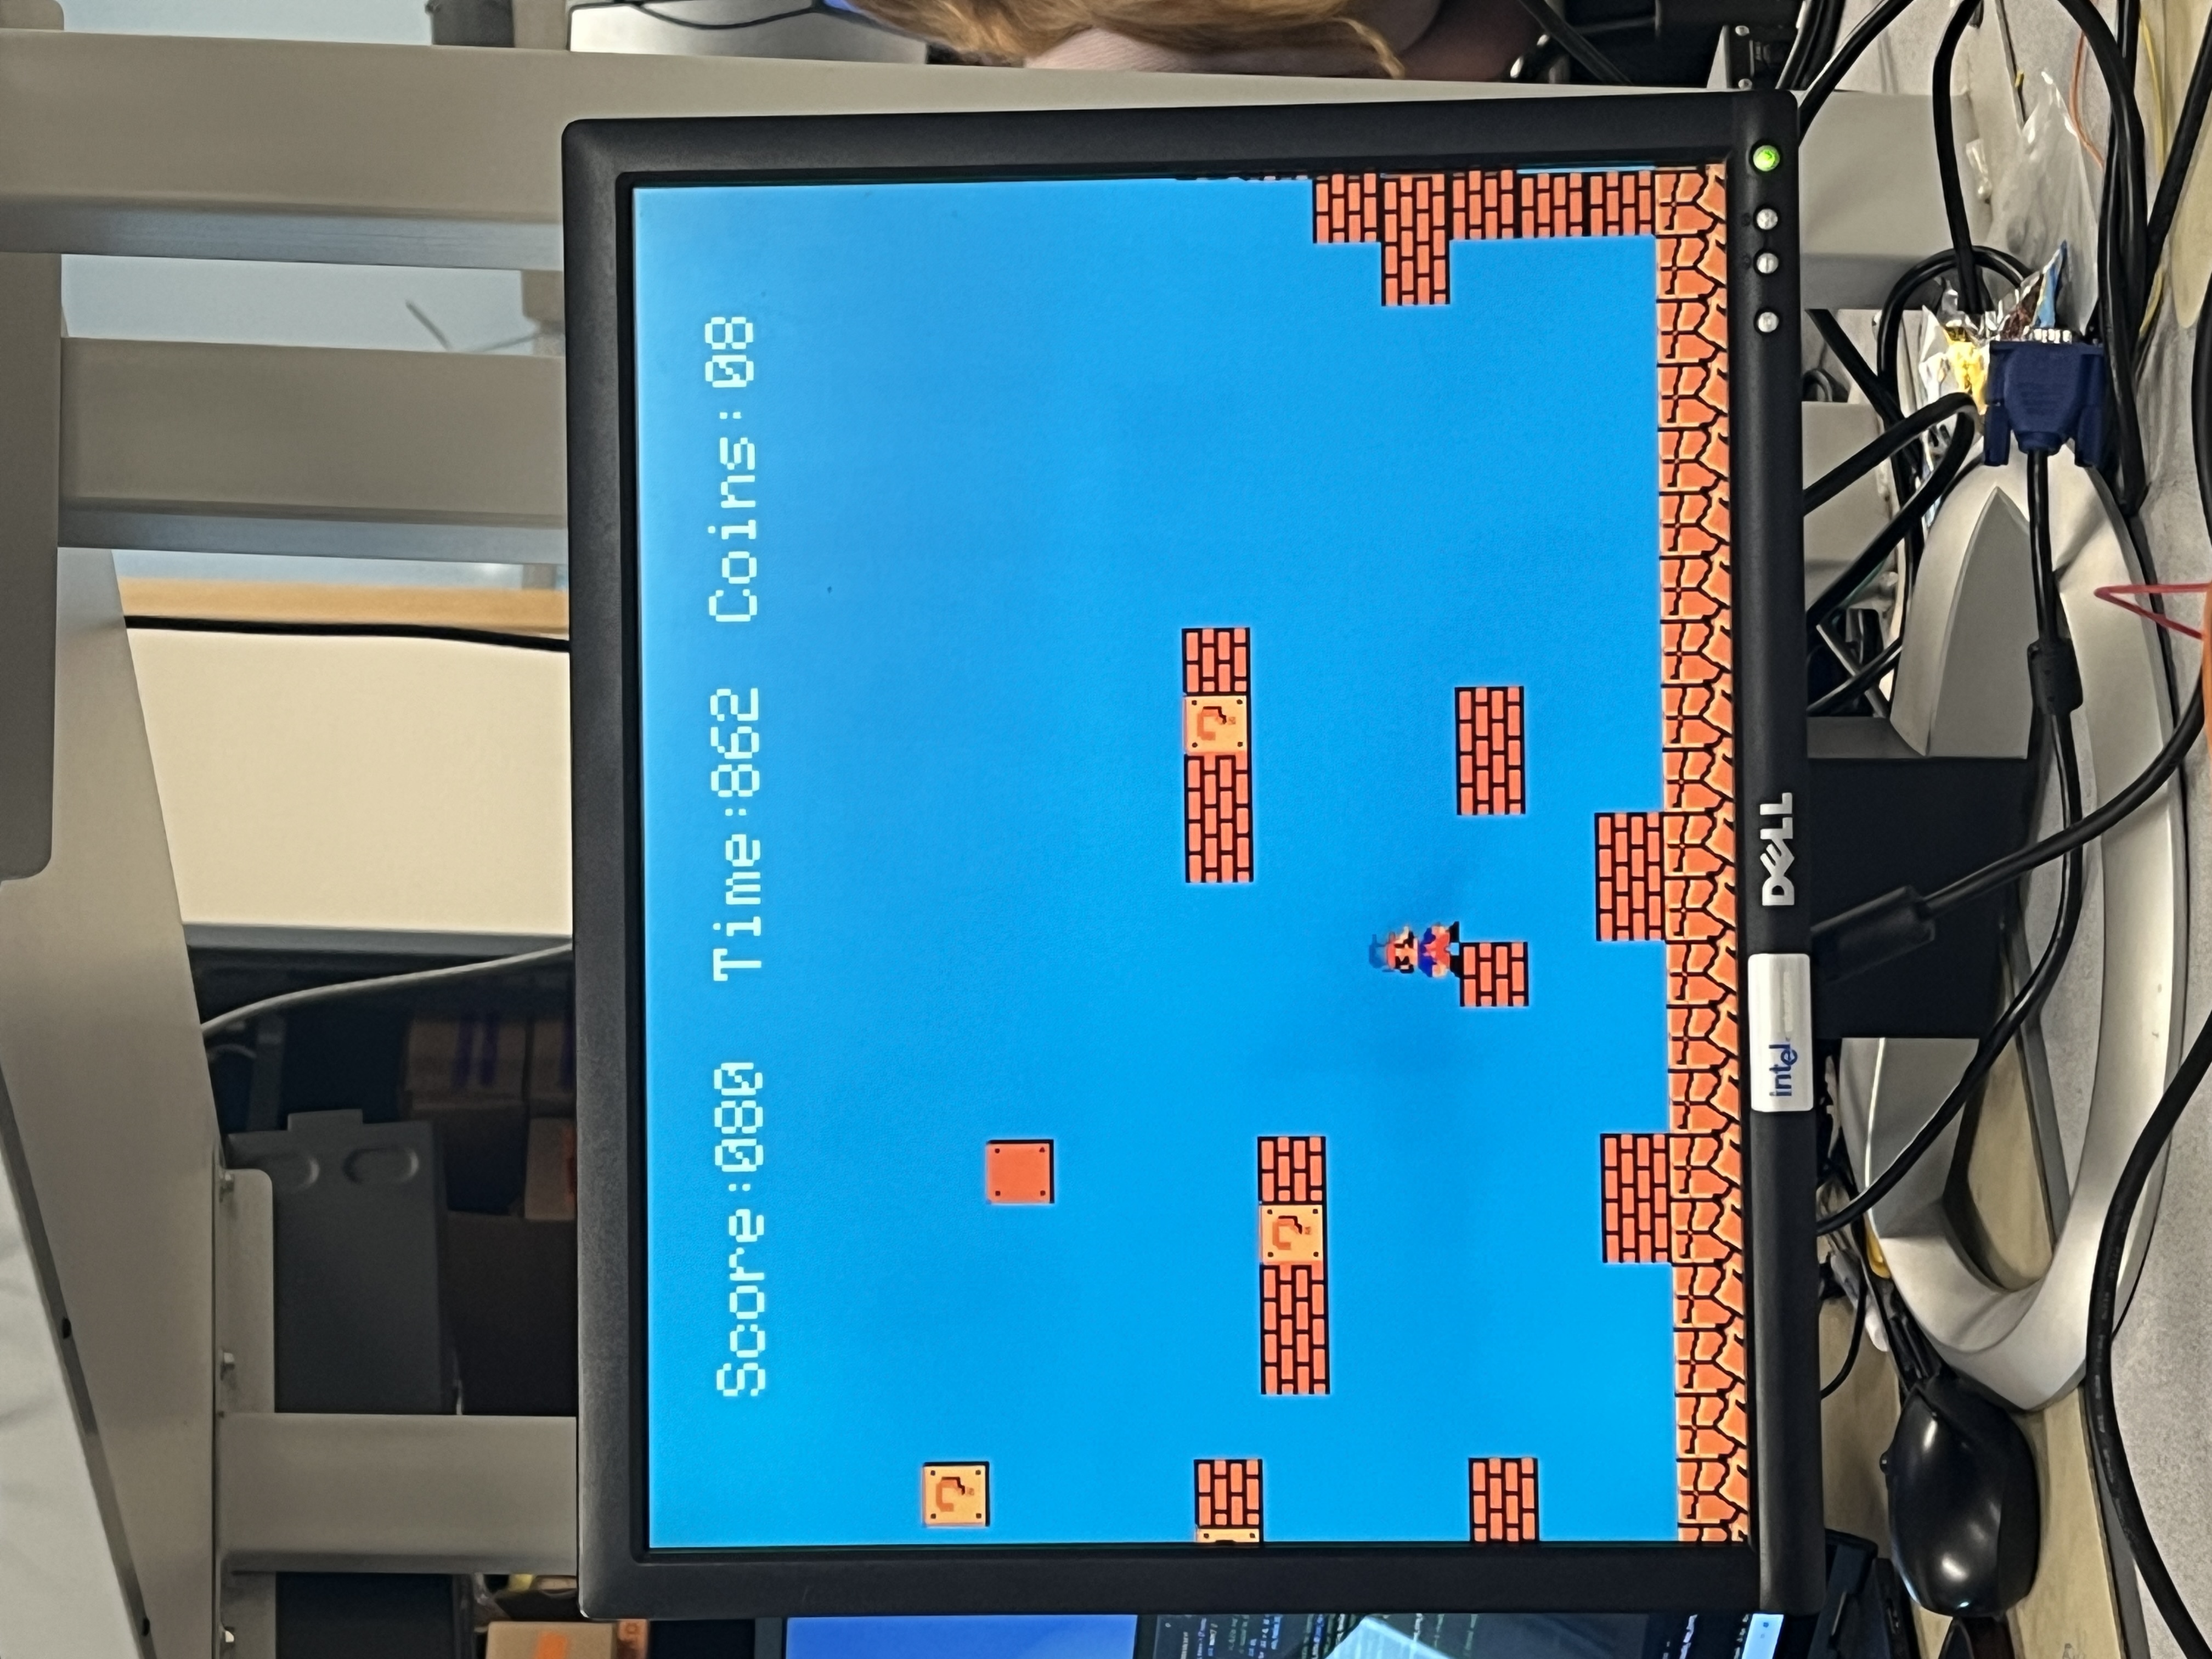
Players control Mario through four dedicated inputs. Two tactile buttons steer horizontal movement: pressing the left button moves Mario left, while the right button moves him right. A separate jump button applies an upward velocity impulse against gravity, allowing Mario to clear gaps and enemies. Finally, a reset button instantly clears the screen and restarts the level, re-initializes scores/enemies/time, giving players a quick way to retry. All inputs are sampled via GPIO each frame and handled in our Protothread–driven main loop to ensure responsive, flicker-free gameplay.Quick Gameplay Preview
High-Level Design
- Rationale & sources: Where the idea came from We are both fond of retro, scrolling-style games. We also both particularly enjoyed lab 2 and loved the idea of doing something that you can directly interact with. As such, we set out to create an as-accurate-as-possible recreation of the original Super Mario Bros. This idea also complemented our strengths well, as Noah is strong in areas dealing in physics, while Max is much better at front-end and the artistic side of things. This allowed us to each focus on a different part we were stronger at.
- Background math: Key formulas or algorithms At heart, the physics of the game are rooted in basic mechanics. Our physics core relies on simple Newtonian motion under constant gravitational acceleration, discretized per frame. We provide a hard-cap of his downward velocity in order to prevent runaway fall speeds. When the jump button is pressed at ground contact, we give Mario an instantaneous upward velocity boost, after which gravity pulls him back down. Horizontal movement is handled by adding or subtracting a fixed speed each frame when the left or right button is held, but only if the tile-based collision check indicates no solid block in the way. By converting Mario’s world coordinates into tile indices, we can efficiently test the few tiles around his feet and sides to prevent him from walking or falling through walls. To create the illusion of a scrolling world much larger than the 640×480 display, we maintain a single “world_x” offset that follows Mario once he moves past the center threshold. Instead of moving Mario past that point, we shift the viewport by the same amount he would have moved, then redraw only the tiles and sprites visible in the new window. This technique keeps Mario visually centered while the background glides by. Enemy Goombas use the same gravity-and-bounce rules as Mario, plus a constant patrol speed that reverses whenever they hit a wall; their sprite frames advance on a simple timer so that their walking animation stays in sync with the game’s 60 Hz update loop. In order to prevent flashing and lag, we had to tweak the way we redraw. For Mario, we realized that no matter what, the VGA will draw over old pixels; We used this to our advantage in our Mario animation. Instead of blueing out the entire sprite, we only blue out the pixels that Mario was previously at that don't overlap with his current hitbox. That way, this avoids the blue flashing we were initially getting. To fix the lagginess of the scrolling and smooth that out, we only redraw pixels as fast as Mario moves, rather than re-drawing everything. One of the things that we really took to heart on recreating mario was the graphics. In order to create accurate sprites and tiles that were true to the original, Max first downloaded the app PixilArt on his iPad. He was then able to carefully, pixel-by-pixel draw out the sprites and tiles to figure out exactly which color each pixel needed to be. The next step was to convert them into Python numpy arrays in order to easily print them out. Since Python and C Arrays were easily converted between one another, this was an easy means of testing how the graphics were coming along. Yes- Each pixel was hand-coded for every sprite and yes- it took forever!
- Logical structure: We organized our game into distinct modules for simplicty. Each file was coupled with its own header file for easy compatibility between modules. We repurposed the animation.c file from Lab 2 and used it to serve as our main file. We have dedicated files for drawing sprites, drawing tiles/screen, collision/movement physics, games states, struct handling, storing level data, as well as a colors header file where we define our own shorthand definitions for the provided colors to make our arrays cleaner and easier to write/read visually. A summary of each is provided in the table below. This modularity made the game much more manageable, and we kept adding more modules as we saw fit.
| File | Purpose / Description |
|---|---|
drawtile.h |
Declarations for tile‐map drawing routines and tile bitmap data. |
drawtile.c |
Implements functions to render individual tiles to the VGA buffer. |
colors.h |
Defines RGB color constants (e.g. OB, YL, WT). |
gamestates.h |
Enumerates the different game states (e.g. PLAYING, GAME_OVER). |
gamestates.c |
Implements the state‐machine logic for transitioning between menus, play, and game‐over screens. Also
defines the init_game function to start up the game |
drawsprites.h |
Declares sprite rendering functions and animation frame constants. |
drawsprites.c |
Contains routines to draw and animate Mario, Goombas, coins, and other moving objects. Has convenience wrappers for each of these for easy access. |
drawscreen.h |
Function prototypes for drawing the level viewport and status bar. |
drawscreen.c |
Implements full‐screen redraws, including the scrolling tile window and HUD. |
animation.c |
Protothread‐based timers and animation schedulers (e.g. enemy walk cycles). |
movementphysics.h |
Declares physics update functions and constants (gravity, jump velocity). |
movementphysics.c |
Implements Mario and Goomba kinematics, collision detection, and boundary checks. |
initstructs.h |
Defines the data structures for characters, enemies, and game state. |
initstructs.c |
Initializes all game objects (position, velocity, alive flags, etc.) at startup/reset. |
leveldata.h |
Contains the raw, constant 16×421 tile map for Level 1. |
leveldata.c |
Copies the flash‐stored map into RAM and handles runtime modifications (e.g., Q‐block hits). |
Program/Hardware Design
- Program details: What was tricky to write? The program that we build consisted of both a software and hardware component. The software was the main focus of our project and was built around the Raspberry Pi Pico board. The software was built in C and was designed to run on the Pico board. The software was designed to be as efficient as possible in order to run on the limited resources of the Pico board. The hardware consisted of the gaming controller. There were many more dynamics for the software to consider including but not limited to, the sprite movement physics, collision physics with blocks, drawing the level out, maximizing efficiency by minimizing computations needed per frame, calculation and drawing statistics, detecting a game over when Mario hits a goomba, runs out of time, or falls below a certain y coordinate, resetting to rebegin the level, transitioning between frames to give the illusion of movement, and drawing the level data. The hardware was much simpler and consisted of the Pico board, a VGA output, and a custom controller. The controller was built using three buttons, one for left, one for right, and one for jumping. These buttons interacted with the software by sending a signal to the Pico board when they were pressed and in this way interacted with our software. The trickiest parts were elaborated on more int he external code and design portion but included creating the maximum efficiency for our program, ensuring that the collisions of Mario were tight enough to squeeze through one block gaps, and that the flickering of the characters and the level background screen would not be apparent while at the same time still maintaining the illusion of movement.
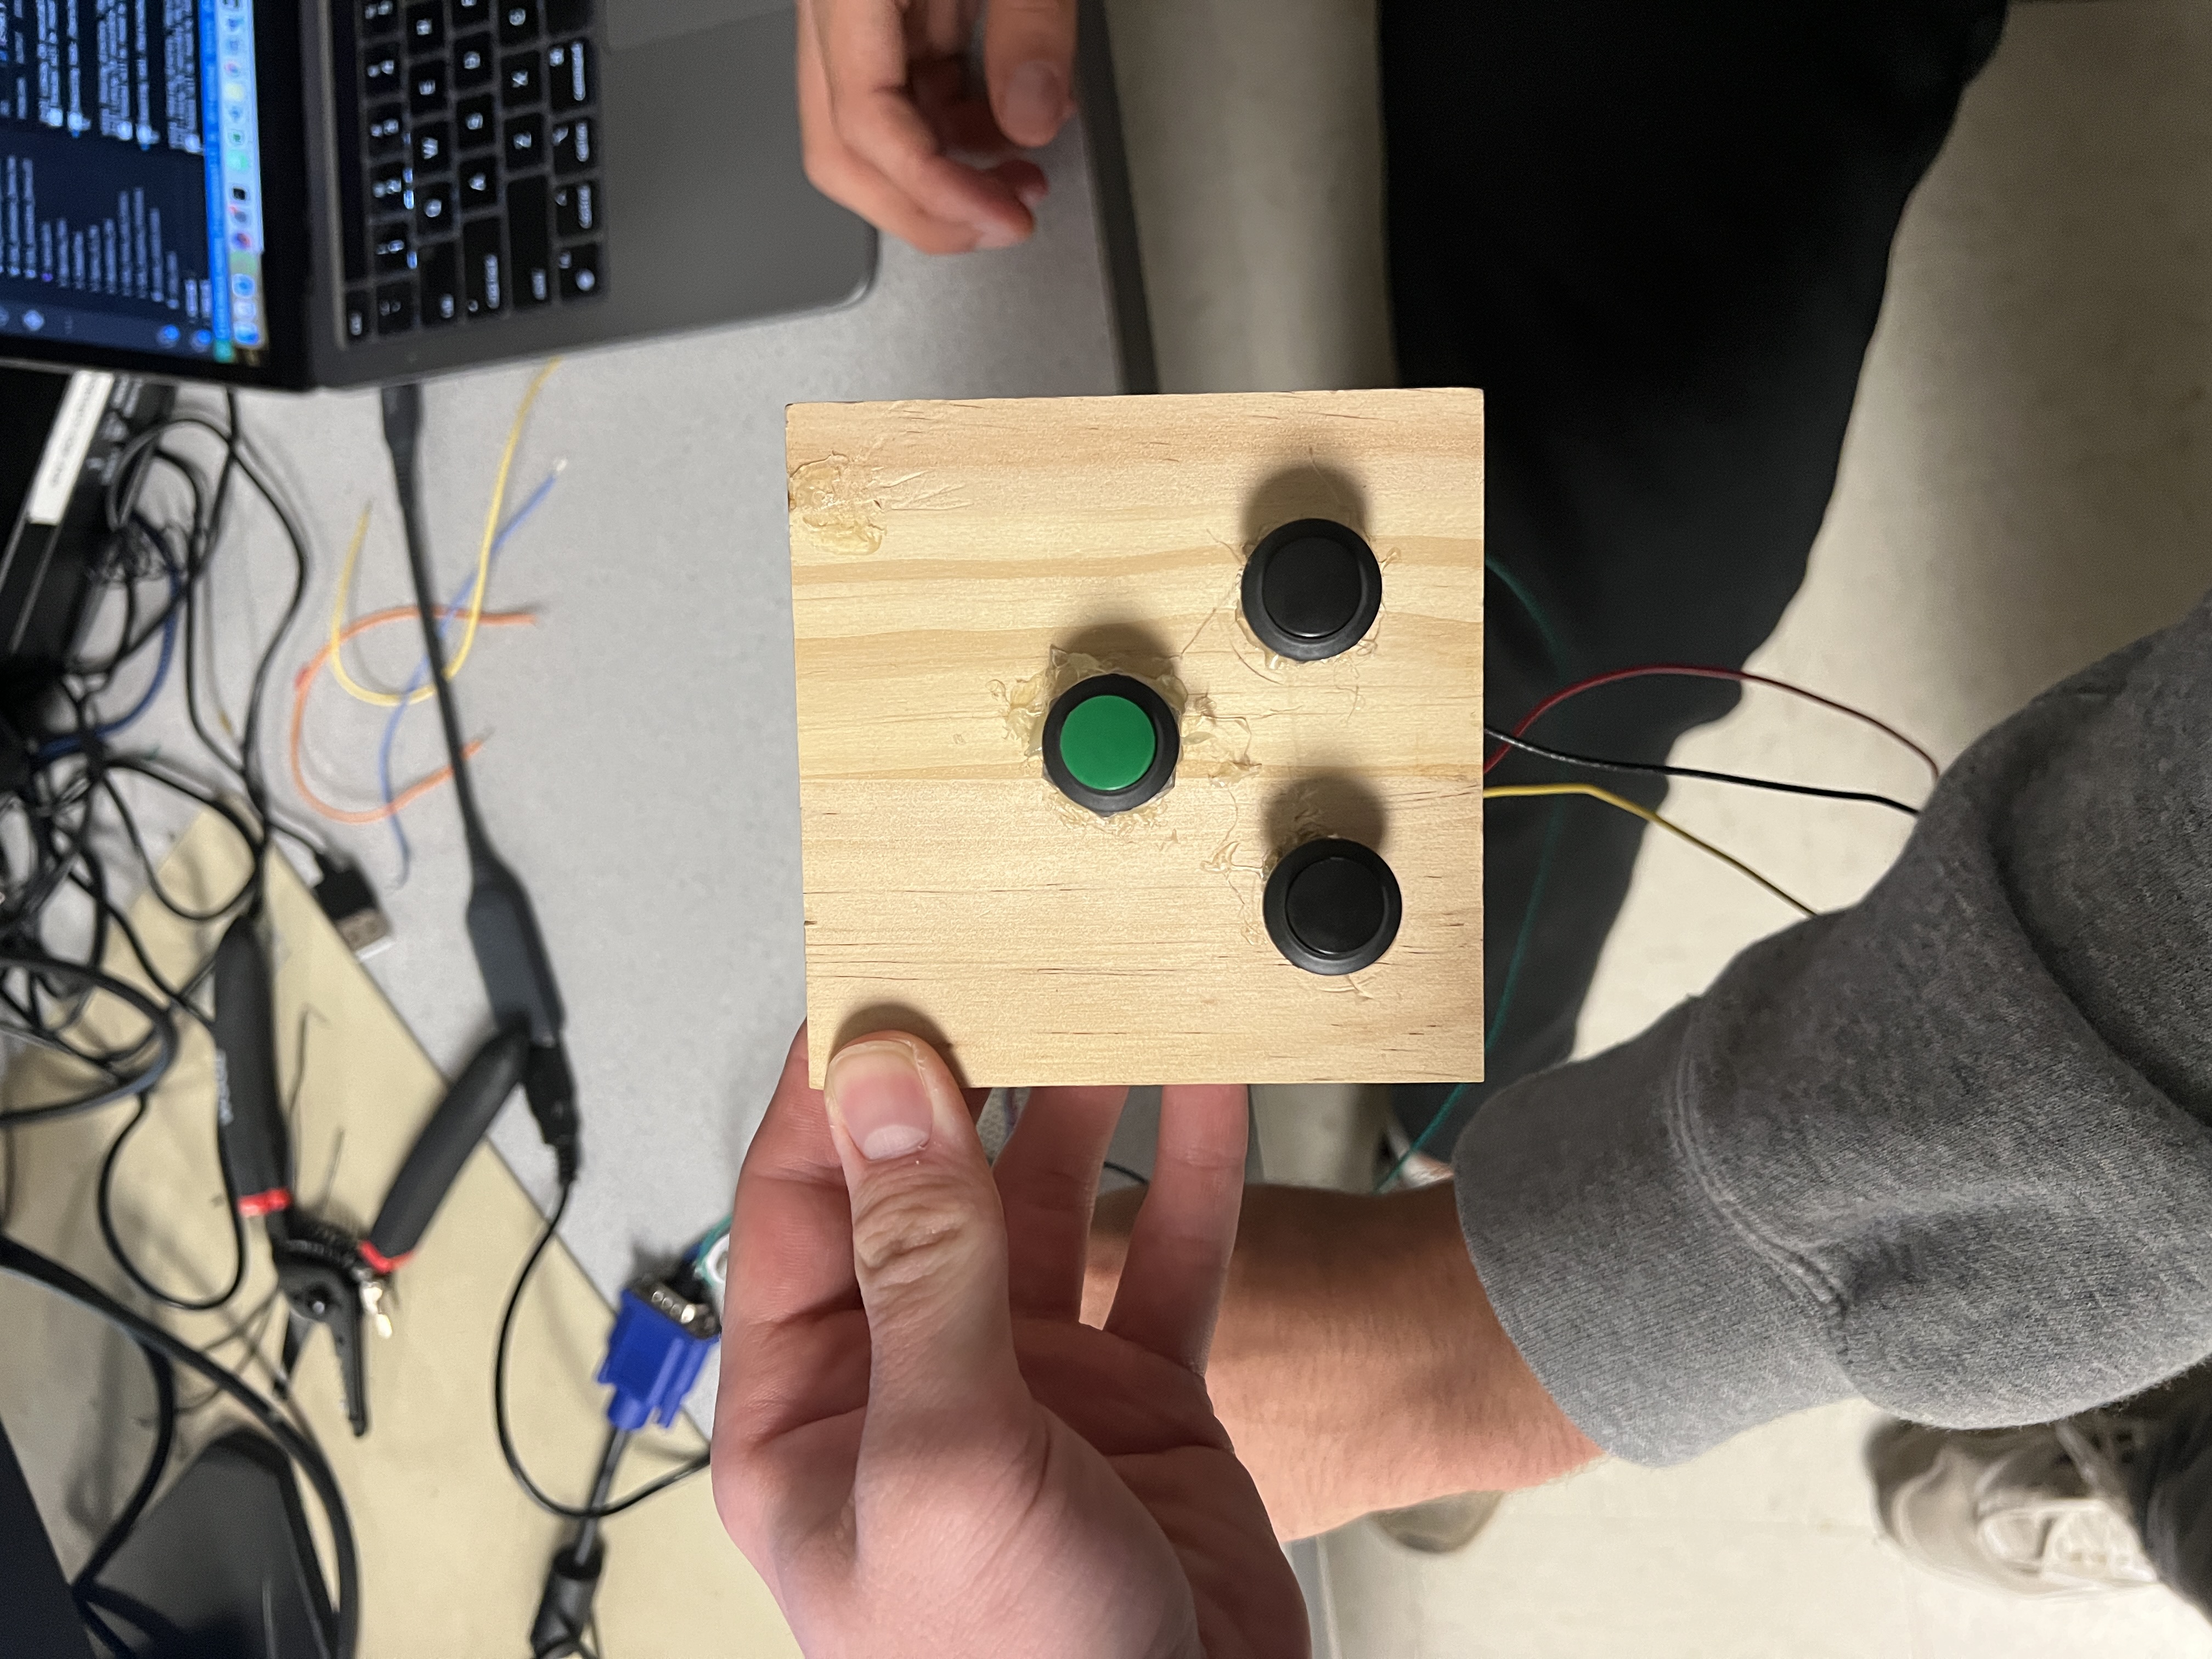
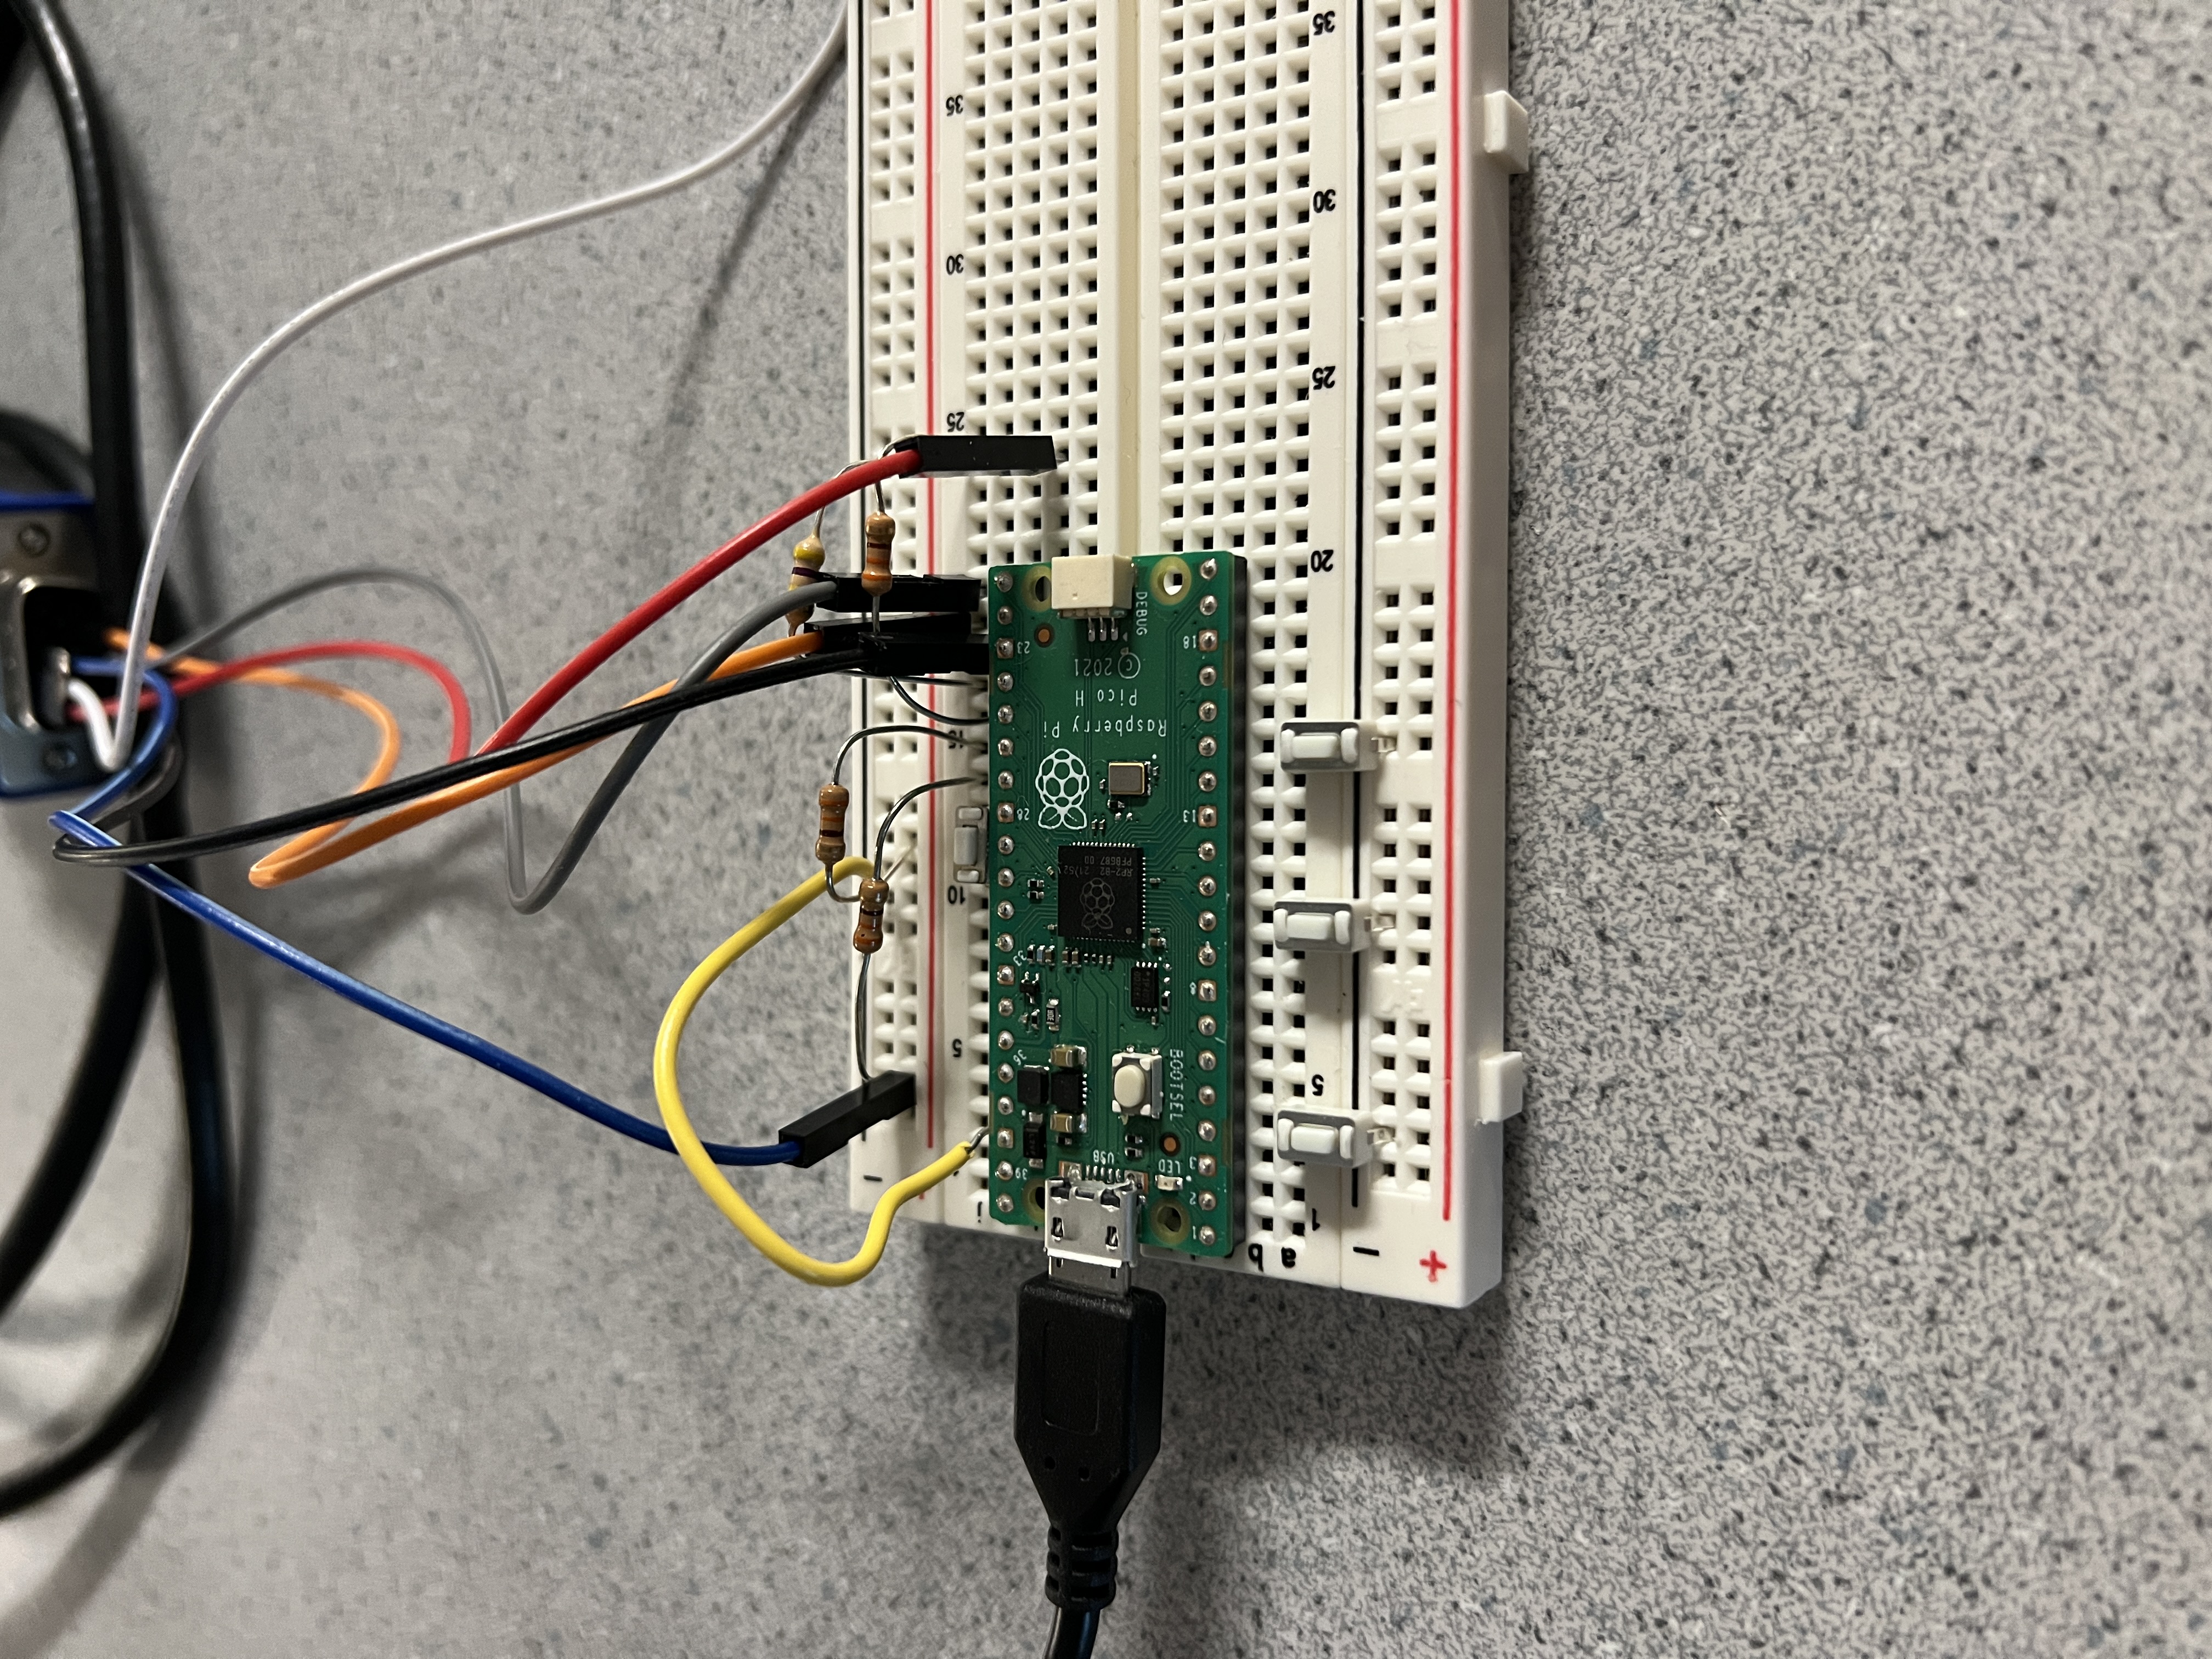
- Hardware details: How to reproduce your setup While a majority of our program focused on the software side of things, we did have to consider the hardware as well. We used a Raspberry Pi Pico 2040 board to run our game. Some of the output pins were used for connecting to our VGA in the same configuration that was used for lab 2. The wires were connected through a resistor that would feed into inputs on the VGA cord. For a further description, you can read the Lab 2 manual. We stuck to 4 bit colors for the VGA output, which was a limitation of the Pico board. This meant that we had red, blue and a light and dark green color to produce our color combination. We could have adjusted our resistor values if we needed slightly altered color values but we found that the available colors and breadth of colors was sufficient. The other main hardware consideration was the custom controller that we had built. This was done by using three buttons, one for left, right, and jumping that we found that were similar to the ones that would be used for a gaming controller. I soldered wires to the two leads of each button, one for ground and one for the high output. Using a block of wood, I drilled three holes for the buttons to be placed into. The wires out of the buttons were fed through these holes and the buttons were hot glued into place for stability. The ground wires were soldered together and another ground wire coming off of the juntion was connected to the Pico ground pin. The other wires were attached the their respective GPIO pins at 12, 13, and 14. A reset button was also created in a similar manner with a wire from one side connecting to the same ground rail and the other connecting the GPIO 15 input. The software would then look at the value of each of these GPIO pins. Since the Pico already has an internal resistor for each GPIO pin, there was no need for a more complex configuration. The Pico board was powered by a USB-C cable that was connected to our laptop. This allowed both power and running our program. For each of the buttons, they were considered active high which meant that when the button was pressed, a short was created through it and while it was not pressed, the voltage at the GPIO pin read zero as there was an open circuit for that portion. Each movement and jump button triggered a special case in the movement physics file and the reset button would change the positoin of the sprites, reset the level data array back to the original version, reset all statistics back to zero, and reinitialize the game state. We now had a fully functioning controller that made testing easier and more enjoyable.
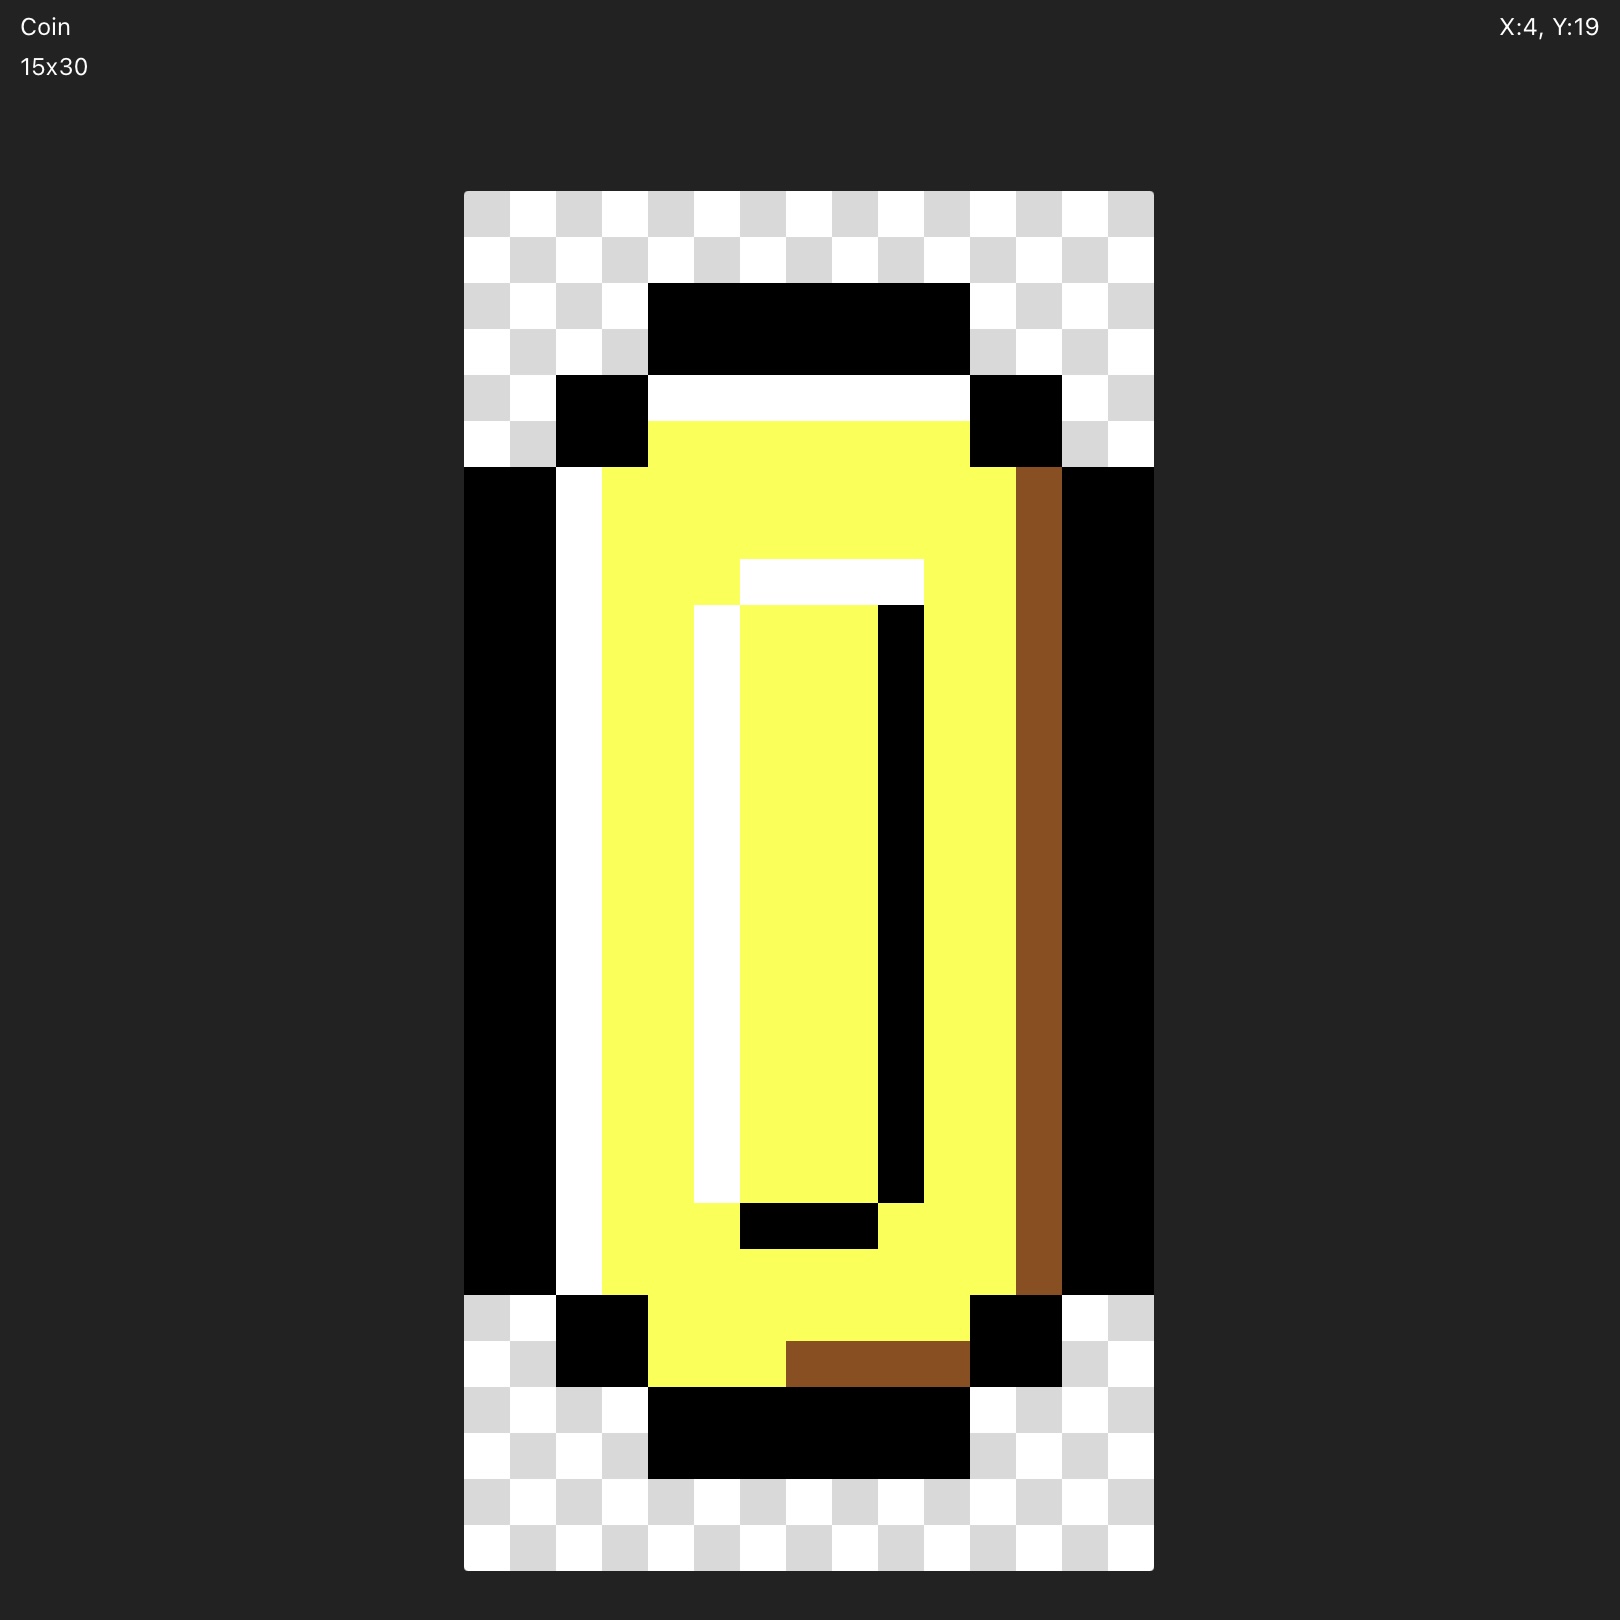
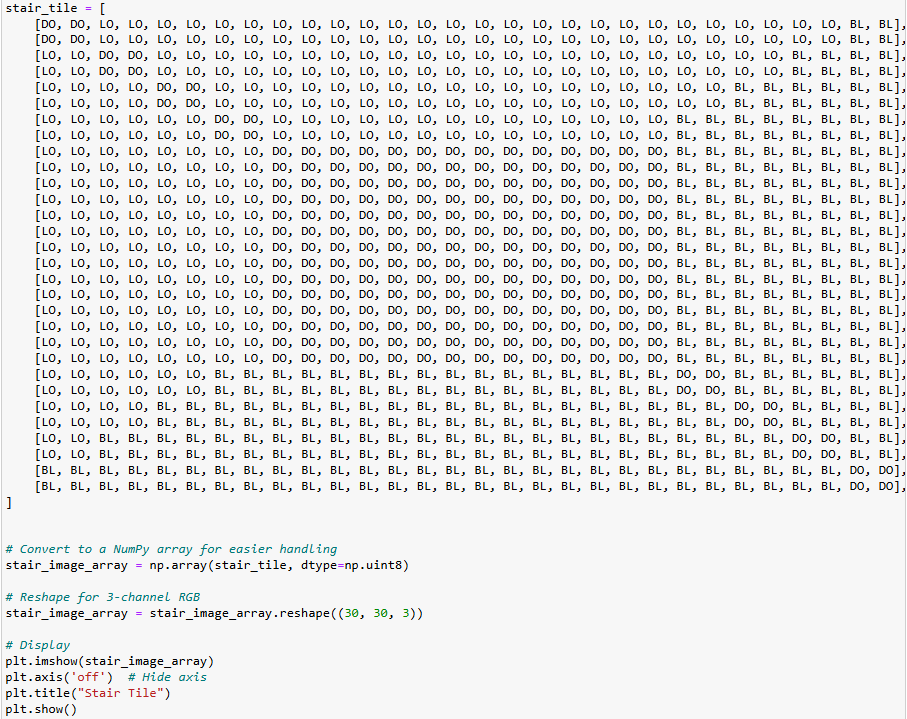
- External code/design: References to any third-party code In the design of our game, we had many consideratinos and challenges including constraints with the VGA, Raspberry Pi Pico, and difficulties with balancing game dynamics. In order to get started we began by strategizing the best way to implement our game. We decided to create a file called leveldata that holds an array of characters for our level. The size of this array was originally 16 rows by 50 columns but was expanded to 16 rows by 421 columns as the level got larger. We chose to use chars as the variable in each index of the array in order to conserve memory on the Pico as this was the lowest number of bytes per index that could be taken up. Each char corresponds to a specific tile in the game. Each tile is a 30 by 30 pixel array that could be drawn. This took advantage of the block design of the original Mario game to simplify the development process. There was a large case statement that was used to determine which tile to draw in each space on the VGA screen and logic to determine which portion of memory to read out of. In order to do this, we created attributes to each of our structs called world_x. This was different than the local positions that would dictate where on the screen the different structs would be drawn. This world_x variable was passed into a function that looked half a screen width to the left and right, pulling the tile locations out of the level data array that would be shown just in that region. This improved the processing speed of our game as not only the tiles that needed to be drawn were drawn. Now that the level was set up to print onto the VGA screen, we had to figure out how to update what was being shown for the level background as the screen scrolls. Initially, this was tricky because there wouuld be a flickering effect from our original approach of blanking out the VGA screen and redrawing the level in the new position. The same approach was taken for the Mario character to prevent his flickering, only blanking out the pixels that were not in the new frame location for Mario. This cause a flashing effect each time that the frames moved on that was not desirable and degraded the user experience. In order to first solve this, we changed it so that the screen was only blanking and redrawing each time that the Mario character was moving to the right and new data was needed to be drawn. From a high level overview, this prevented flashing when there was no new level data needing to be shown. The rectangle was calculating using this check method and then setting the width of the rectangle to the speed of the character in that direction and the height of the rectangle to the tile height for maximumum drawing efficiency. The phrase of blanking out means that a blue rectangle was drawn over the VGA pixels that we no longer wanted to show, blending in with the already blue sky background color. Solving the issue of flashing as Mario moved right and new level data was needed to be drawn was tricky. In order to successfully mitigate it, we decided to provide a conditional check with our level data so that as the tiles would slide over, providing the illusion of Mario moving across the level, the new level would redraw over the old blocks and only the portion of the old frame background that did not overlap with the new one would be blanked out. This would be when there was a sky tile directly to the right of a brick tile. In other cases, there was no need to blank out the tile. Once we removed that, the flashing of the background had stopped. There was still an ongoing problem with the processing speed of the VGA and the Pico board that impacted the movement speed of Mario. In parts of the level and development phases were many pixels were being drawn on the screen, it would take longer between frames, making Mario to appear to slow down. In order to solve this, we overclocked the Pico to 250 MHz. This was the maximum speed that the Pico could be overclocked to without damaging the board. This allowed for a much smoother experience and made it so that Mario was not slowed down by the processing speed of the VGA and Pico. In order to further reduce the apparent difference, we also tried to even out the tiles that were being drawn in each segment of the level and improved the efficiency of the redrawing function like described before. With the level data and the background drawing function working, we needed to implement the Mario character. This was done by creating a struct that held all of the information about Mario including his position, velocity, and whether or not he was alive. This struct was then used to determine where Mario was on the screen and what he should look like. The struct was updated each frame based on the input from the buttons and the physics of the game. The struct was also used to determine if Mario was colliding with any of the blocks in the level. This part was tricky because the logic for the background meant that if we were starting Mario at different places, the collision detection would differ. We decided to fix his starting location for the remainder of testing. It was also crucial to maximize the efficacy of the collision detection. This meant that through trial and error, we had to determine where the edge pixel of the Mario character box could go before it is detected to hit a tile. This was done by checking the tile type that the edge of the box was in. We also implemented logic for collecting coins and keeping score. When a coin was collected, the score would increase by 10 points. This occured when the top of the Mario box was determined to come in contact with the bottom of a question mark box, one of the tile types that was defined. When the question mark box was hit, the tile type would change to a deactivated question mark box. This was done by changing the char in the level data array to a different char that was defined in the case statement. This was done so that the tile would not be drawn again and would not be able to be hit again. The logic for this was tricky because it had to be determined if Mario was in contact with the bottom of the box or if he was just above it. This was done by checking the position of Mario and the tile type that he was in contact with. If he was in contact with the bottom of the box, then the tile type would change and the score would increase. If he was just above it, then the tile type would not change and the score would not increase. This was done to prevent Mario from being able to hit the box multiple times and to make sure that he could only collect coins once. Each time that the question mark box was hit, the coin sprite would be initialized and draw and it's velocity would move it upwards. I added a certain number of frames that it would be shown for and then it would despawn. I also made it so that if two coins were collected at the same point, the first one would despawn to prevent any issues from overwriting. The last part of the game was to implement the Goomba enemy. This was done by creating a struct that held all of the information about the Goomba including its position, velocity, and whether or not it was alive. This struct was then used to determine where the Goomba was on the screen and what it should look like. The struct was updated each frame based on the physics of the game. The struct was also used to determine if the Goomba was colliding with any of the blocks in the level. This part was tricky because we had to determine where the edge pixel of the Goomba character box could go before it is detected to hit a tile. This was done by checking the tile type that the edge of the box was in. We also implemented logic for killing the Goomba and keeping score. When a Goomba was killed, the score would increase by 20 points. This occured when Mario's box came in contact with the top of a Goomba box, one of the sprite types that was defined. When a Goomba is killed, it will disappear from the screen and will not be able to be hit again. The logic for this was tricky because it had to be determined if Mario was in contact with the top of the box or if he was just above it. This was done by checking the position of Mario and the position of the Goomba sprite box around it to see if there was any overlap and if so which parts were overlapping. In order to spawn in the Goombas, the structs had both a local position and the initialization of them took in the world_x value. When Mario was at a certain world_x value, the Goombas would spawn on the ground and would be tracked until they died if Mario stomped them. For Mario to die or lose the game, we added a flag for game over that would be triggered by hitting the side of a Goomba, running out of time on the timer we created to count down (which was also displayed at the top of the screen), or falling below a certain y coordinate. This was done by tracking the local y_position of the Mario character sprite. All of the tiles and sprites were original designs that were created by us. Each char in the level data corresponded to a draw function that looked at a 30 by 30 pixel array that was defined in the drawtile.c file. This was done so that we could easily change the design of the tiles and sprites without having to change the logic of the game. The colors were also defined in a separate file so that we could easily change the colors of the tiles and sprites without having to change the logic of the game. This made it easy to change the design of the game without having to change the logic of the game. In a similar manner, the sprites had different frames that would be alternated between that gave the illusion of movement. This was done by creating different 30 by 30 pixel image arrays that the frames would cycle between. For Mario, the cycles were direction specific and would cycle between Mario facing different directions depending on his velocity. The entire game was single threaded due to the complex nature of the physics and movements being very intertwined. We also didn't find the need for a second core or using interrupts after solving the issue of flickering and overclocking the system.
- Dead ends: Things you tried that didn’t work Despite having many challenges throughout the project, we were able to solve most of them. The main issues that we had were with the flickering of the screen and the speed of Mario. We were able to solve the flickering by changing the way that we blanked out the screen and redrew it. We also solved the speed issue by overclocking the Pico board and optimizing the drawing functions. There were a couple of dead ends that were not really consequential for the end result of our project and within the negligible limitations that we were willing to tolerate. For example, the speed of Mario was being limited due to the computationally intensive nature of constantly drawing on the VGA screen. However, after overclocking and optimizing the drawing functions, we were able to get the speed of Mario to be fast enough for our liking. If further improvements are to be made, this is something to look out for. Another dead end was the collision detection. We had to spend a lot of time trying to figure out how to get the collision detection to work properly. We ended up having to use a lot of trial and error to get it to work properly. This was not ideal but we were able to get it to work in the end for the tolerance that we wanted. There are still some cases where Mario is unable to squeeze through small block gaps or the detection of the Goomba collision is not perfect but by designing the level in a calculated way, we were able to reduce the impact of this to negligible levels.
Results of the Design
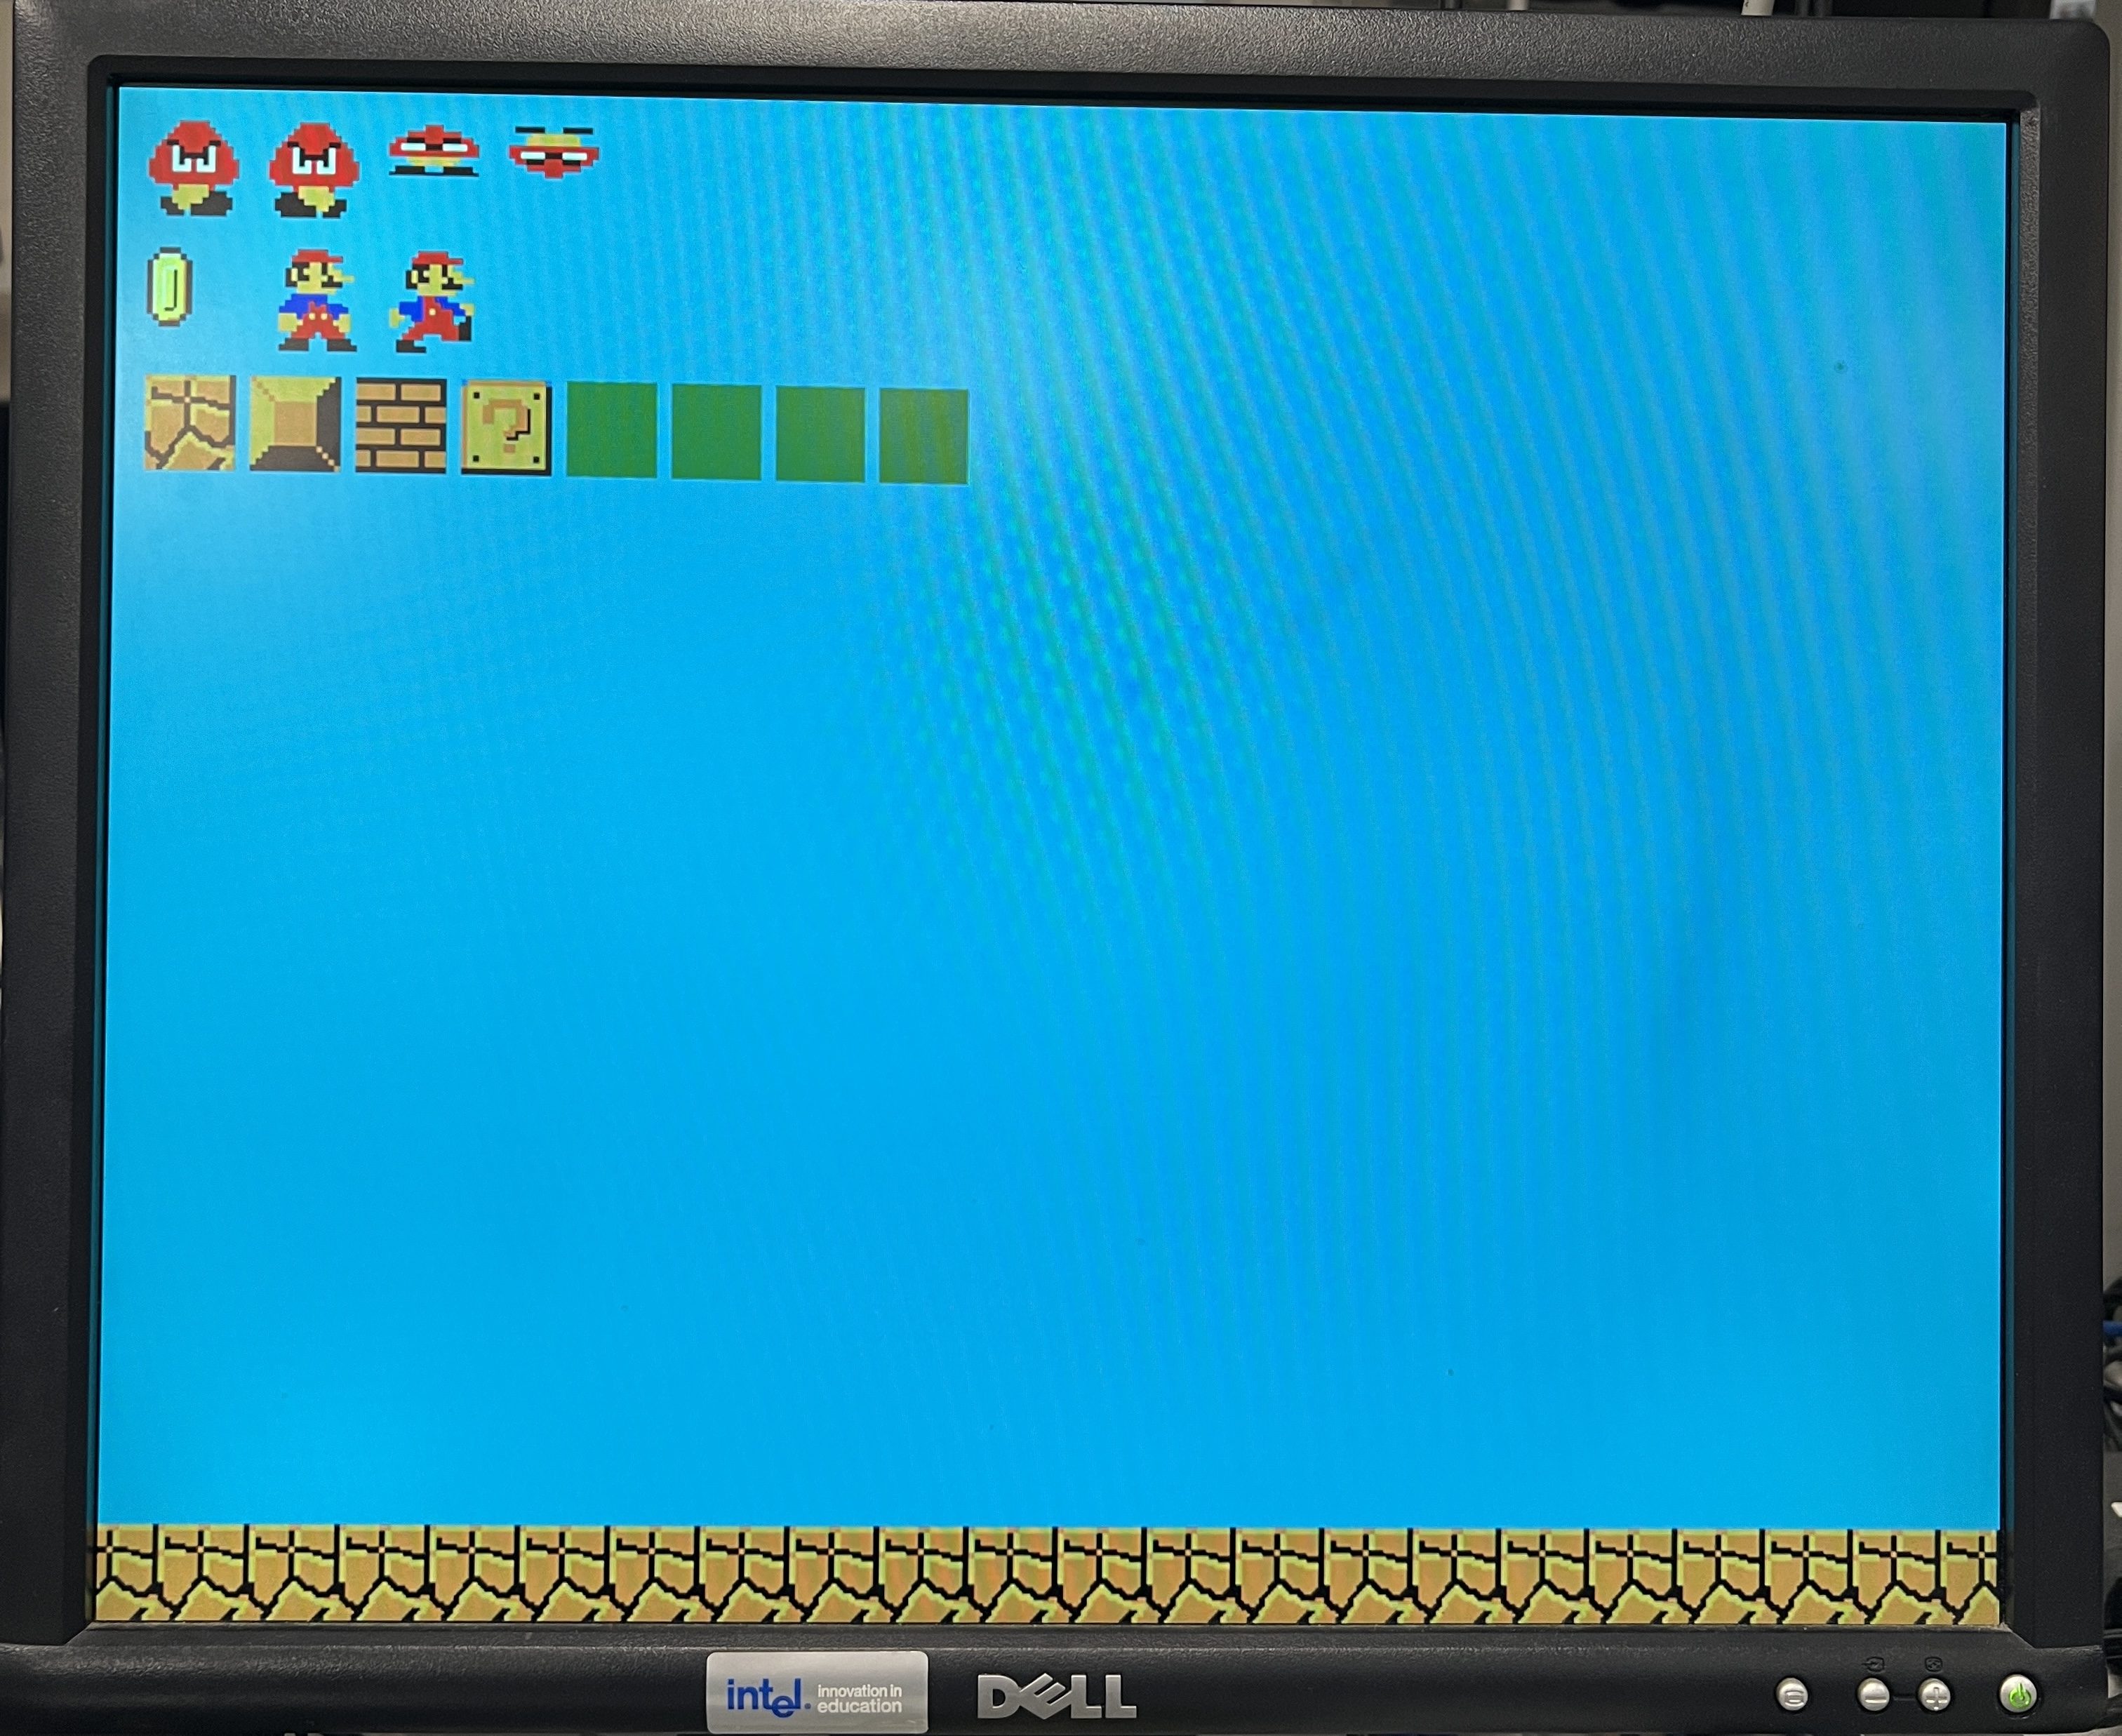
We ended with a nearly spot-on recreation of the original Super Mario Bros. first level, with responsive physics and animations. We successfully implemented all core game mechanics, including basic movement, interaction with the environment, and scoring. Goombas run around the map, properly animated, and Mario can destroy them by stomping on them, or if he runs into them the game ends. Mario can hit his head on brick blocks and mystery boxes to break them or collect coins, respectively. If mario falls out of the world, the game ends, and at the end, spare time is added to the score.
We achieved smooth horizontal scrolling at a consistent 60 Hz, with all background flashing and flicker effectively eliminated. Grate care was taken when designing the level to ensure it was not unreasonably difficult, and there's variation in terrain and obstacles. We have voids in the world, staircases, floating structures, a house/castle, parkour, a "pinball" like section, and a "temple." There's a variety of different layouts for coin spawn points; some involve the user having to break into a building using the aforementioned brick-breaking mechanic in order to continue in the level. Some spots had to be tweaked to avoid the user breaking the game, for example in some of the void section, bricks had to be replaced with solid stair tiles in order to prevent the user from inadvertently breaking the path forward.
Memory usage remained well within the Pico’s 264 KB RAM constraints, leaving headroom for potential future features (e.g., sound, additional levels). We initially thought we may have a memory constraint due to laggy scrolling and flashy animations, but these were instead pinned down to logical errors in how we constructed and re-drew the level. The game is rather immersive on its own without sound.
Our custom controller interface proved intuitive and reliable in testing, though the solder-and-wood construction is somewhat delicate. If the user isn't careful, the wires can get yanked from the breadboard. The reset button on the breadboard is a bit crude but it works well; We experimented with a reset button on the controller itself but we could not find one that wasn't a toggle-button. The larger, more ergonomic buttons are user-friendly and
User testing confirmed high usability: players found controls responsive and enjoyed the authentic retro experience, including Professor Adams. We allowed some of our friends to try the game as well and all were throroughly impressed and found no issues in playing the game.
Conclusions
- How results met (or didn’t meet) your expectations The end result from our project was a nearly perfect recreation of what we expected from the original Super Mario Bros game first level. We were able to get active statistics, a moving character, interaction with blocks, collecting coins, interacting with Goombas, winning and losing, and resetting to play again. From that perspective, every result that we had set for ourselves was met. There are a few additional items that were not critical to a minimum viable product of the game that we wish we could have implemented but had ran out of time to do. This included adding a sound for the Mario game and for the different interactions. We would likely have had used an alternate soundtrack for copywrite considerations but the process of setting it up would have been similar to the sound channels that we used in the Lab 1 setup. We also would have liked to add other enemies and powerups to the game. This would have included a mushroom that would have made Mario grow larger and be able to stomp on Goombas without dying. It also would have included an invincibility star and koopa troopas. The reason we did not include these is that each one would have required additional collision detection and sprite drawing functions that would have taken a lot of time to implement. However, the functionality example is all there already with the other sprites we did end up using meaning we certainly had the capability of doing it.
- What you’d change next time We would also have liked to have added a better way to handle the collision detection. This would have made it easier to add new enemies and powerups in the future. This could have been done by being more careful with the drawing for the Mario character so that the pixels that were seen for Mario aligned with the edges of his hitbox so that tthe trial and error process could have been refined. We would also have liked to have added a better way to handle the drawing of the level. This would have made it easier to add new levels in the future. I wish that from the beginning, we had taken the approach of maximum efficiency with our drawings. This would have prevented needing to toil over different techniques to eliminiate the flickering for the character and the background tiles. I also would have kept the backtround drawing separate from the movement and collision detection so that we could have used both cores of the Pico board to speed up the processing even further. We should have also designed a better controller. While the functionality of the controller was complete with no flaws, I wish we had bought parts in advance to design a more professional looking controller similar to the Gameboy original handheld design that we were trying to recreate.
- Futures Considerations If we were to pick back up on this project in the future, there's certainly plenty of room for expansion. The most obvious expansion path would be to add support for multiple levels. Considering each level is stored in its own array and loaded at runtime, this could be easily done without further resource allocation. We could also aim for a more perfect recreation of the original Mario by adding the pipe tiles (draw stubs and concept art were created but ultimately scrapped when time ran low). We could also add power-ups (such as the Toadstool mushrooms and turtle), and more goombas. Sound was also at one point on the table, however this would have been rather involved due to the need to recreate sounds from scratch or source them from the public domain. The additional hardware considerations (such as audio output and the need to use the Pico's DAC) could be implemented fairly easily as in labs 1 and 2. We also could design a more professional and sophisticated game console. Instead of delicate wires plugged into a breadboard, we could mount the Pico and all hardware directly on a solderboard and contained everything in a box. We could 3D print our own controller or buy a kit for this purpose. To make the experience even more user-friendly, battery power could be implemented as well as a direct VGA plug on the console, avoiding having to plug in individual wires each time the user wishes to play. While our current implementation is a great prototype, there is plenty of room for creating a more polished product, and perhaps one of us will decide to take this on as a personal project in the future.
- Standards compliance The project was designed to be as compliant as possible with the original Super Mario Bros. game. We used similar level design, character design, and game mechanics as the original game with our own twists on them to prevent intellectual property considerations. This included diffrent looking sprites and tiles, different colors, and slightly different movement speeds and physics. The construction was also in compliance with engineering development standards in which we used a methodical testing process that we kept well documented and tracked to ensure that the project was both completed on time, throroughly tested for corner cases, and that we were able to reproduce the results that we set out to achieve. The project was also designed to be as efficient as possible with the limited resources of the Pico board. We used a single core for the entire project and used protothreads to handle the different tasks that needed to be done. This made it easier to manage the different tasks and made it easier to add new features in the future.
- Did you reuse or reverse-engineer any design? The main reusing and reverse-engineering was from our Lab 2 design with the Galton board. We used this to determine how to connect the VGA to the Raspberry Pi Pico board. We also used this in order to determine how to set the draw functions for the screen and creating our own colors to use. Besides this basic understanding, there was very little that was reused apart from any graphic inspirations we used in designing the aesthetics of the level tiles and the sprites.
- Non-disclosure agreements or patent issues? There are no non-disclosure agreements regarding this. There should be no patent issues considering that the patent for the original game design is likely expired considering thet time that has passed and the graphics and movements, while inspired from the original Super Mario Bros, was not a direct copy of the game with our own unique twists added on top.
- Any opportunities for patenting your work? There is no opportunities for patenting our work.
Intellectual property considerations:
Appendix A: Permissions
The group approves this report for inclusion on the course website.
The group approves the video for inclusion on the course youtube channel.