August Druzgal, Coraline Chu
We built a game called “Block Stacker” in which the user tilts a controller to stack blocks on a digital platform in a 2D simulated physics environment, complete with interactive controls, goofy graphics, and exciting background music.
What we built and why
The gaming interface mainly consists of colored boxes spawned from the top of the screen, falling under gravity calculations, and landing on a rotating platform. Once the block lands, it will snap into an invisible grid structure similar to the tetris game and slide along the board. The user’s goal is to control the tilt of the board through input of the controller to let as few blocks fall from the edge of the board as possible. The project as such is implemented as an interactive gaming loop that uses only resources on the RP2040: from physics simulation for the box and the platform rotation and VGA rendering to user input from the wirelessly connected controller, which changes the physics simulation.
We created this game as it combines the topics of VGA graphics, real-time control, and physics modeling in class into one design in the final project. The implementation of the game is organized as several elements: (1) a 2D grid to be occupied, (2) a pool of falling boxes, and (3) a platform state that depends on its own parameters as well as the boxes mounting situation. As a result of more boxes falling and landing on the board, the game will present increased difficulty as the balancing becomes more tricky. In addition, we added a bluetooth feature for wireless control for the user input, as well as background music for user experience. For more user friendliness, the user is greeted with an opening page that is decorative but also shows whether the necessary controller is connected. The closing page similarly shows how well the user did, summing the amount of time that the user was able to play without losing. The core physics of the game is intentionally simple but robust, with the combination of gravity, grid-based stacking, and grid sliding to create a dynamically interesting interface while keeping the resources used feasible in an RP2040.
Below is a picture of the gaming setup.
Rationale and sources of project idea
We hoped to create a project that combines the topics introduced and practiced in the class, namely VGA graphics, real-time control, background sound, and physics modeling. A gaming interface would naturally encompass all of these topics, but present each of the subjects in a different manner. In this way, we can create a project of an embedded-system style. In this context, we chose a classic game topic to build our game toward - stacking boxes. The main inspiration of creating a box-stacking game is to be able to render an display that seem physically believable or “real” in the managing boxes weight and balancing efforts, but also being able to use only the resources on an RP2040 to robustly implement the functionalities. One special difference between the physics presented here and the physics in the second lab project is the interaction between the objects moving under physics (boxes here), which is an added layer of challenge for us. Therefore, we designed the physics restrictions to be intentionally simplified but robust to achieve balance with realness and feasibility.
Background math
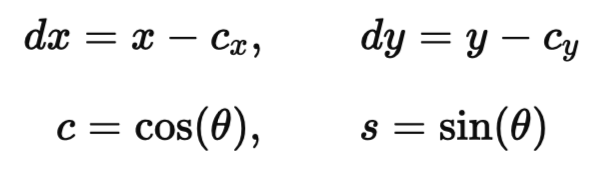
A key design choice to simplify the physics is to represent the motion of boxes in two coordinate systems:
Thus, the boxes that land will follow the local coordinate and behave as a whole, which significantly reduces the calculation requirements compared to what is required to compute realistic box interactions of colliding, falling, and rotating. The coordinate transformation from world coordinates  to board coordinates
  is as follows. (The real equations used in the code have been submitted to AI to generate latex format for the purposes of explanation)
Let dx and dy be defined as the following:
Where  and
and  are central location coordinates of the board’s central axis, and the angle
  is the current rotation angle of the board. Then is defined as:
The interpretation is that  measures the distance of the box along the board, while
  measures the distance from the board upward (vertically, related to how high the box is stacked).
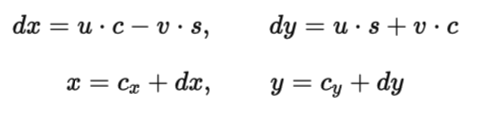
Similarly, the transformation can be carried backwards from the local coordinates to as world coordinates as the following:
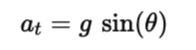
The sliding dynamics on the board is attributed from gravity and some offset as friction. Gravity along the board is simply calculated as:
And the friction is simply carried by a multiplication of a fraction. Combining the tangential gravity and the friction, these two element drives a 1D sliding with velocity of  . The entire grid will be offset at the same speed; the column that offsets outside the range of the board will be removed from the animation.
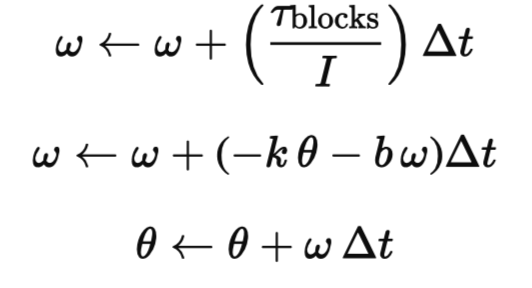
The board is modeled as a damped spring with added torque inputs from the boxes that are stacked on the top. Each individual box occupying a cell in the grid will contribute a torque attribute that is proportional to its lever arm distance along . The mathematical representation of the board system is as such:
Where w is the board angular velocity,  is the board rotational inertia, tau is the total torque on the board produced by all the landed boxes,
  is the rotational spring constant, and
  is the rotational damping coefficient.
Lastly, the boxes’s corner in rotation (of angle ) are computed using traditional trigonometry for drawing in VGA, exampled as:
Logical structure
The gaming system is divided into the following subsystems while organizing around the physics:
The game is organized with protothreads, running protothreads on both cores to maximize the computational power available to the system. Core 0 runs the bluetooth client functions, and core 1 runs the VGA protothread, alongside the music protothread.
Hardware/software tradeoffs
The major resource constraint is the computation power of the RP2040 in the physics calculation. As we discussed above, in order to allow feasible resource use on the RP2040 to successfully implement this game, we used the grid-based physics animation in place of the rigid body simulation for boxes. The drawback is that the visual will inherently look less physically realistic, especially during contact. Below is a comparison of strategies.
LEFT: Traditional rigid body collision (gamedev.net) vs RIGHT Box stacker, grid based
Copyrights and trademarks
There is no known copyright and trademark related or used in our project. Libraries and codes used for user input control and VGA rendering are all common and available in the public domains or course websites. The implementation of the physics is original software written by the group members, based on common physics formulas.
Organization of objects/elements
The program is organized around a set of structs (boxes, board) and global constants (physics parameters, current grid positions and velocities) that define the main objects in the game, and will update in real time.
Key structs include:
The boxes that fit the condition of landing will be stored in grid[GRID_COLS][GRID_ROWS], specifically with 15 columns and 12 rows. Each cell has the predefined width and and height of 20 pixels. When the board rotates (angle updated), the grid with all the boxes within will render with the same angle. The grid will slide with a velocity of grid_v and an offset of grid_offset_u using the math calculations presented previously. These calculations do not affect the falling boxes.
Game state transitions
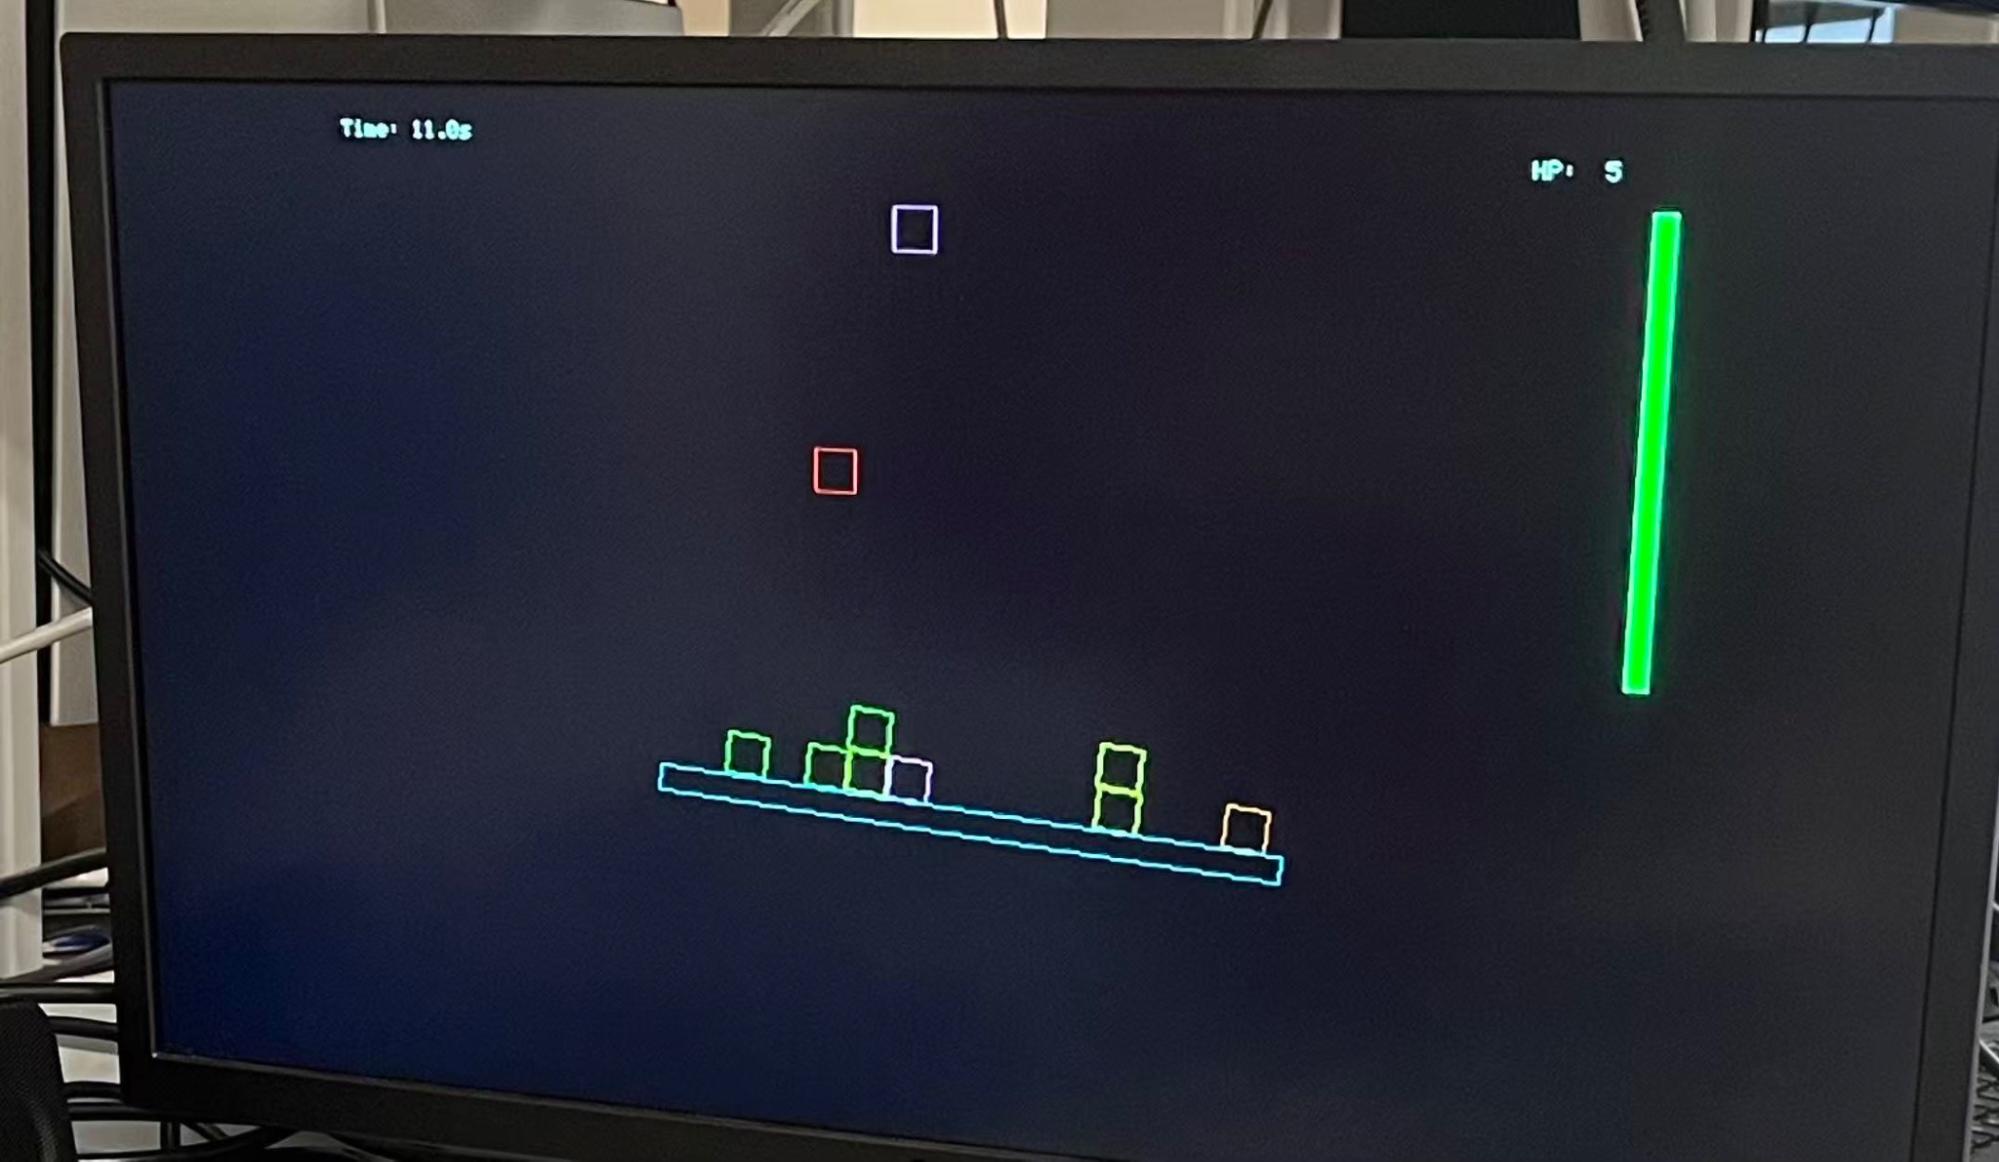
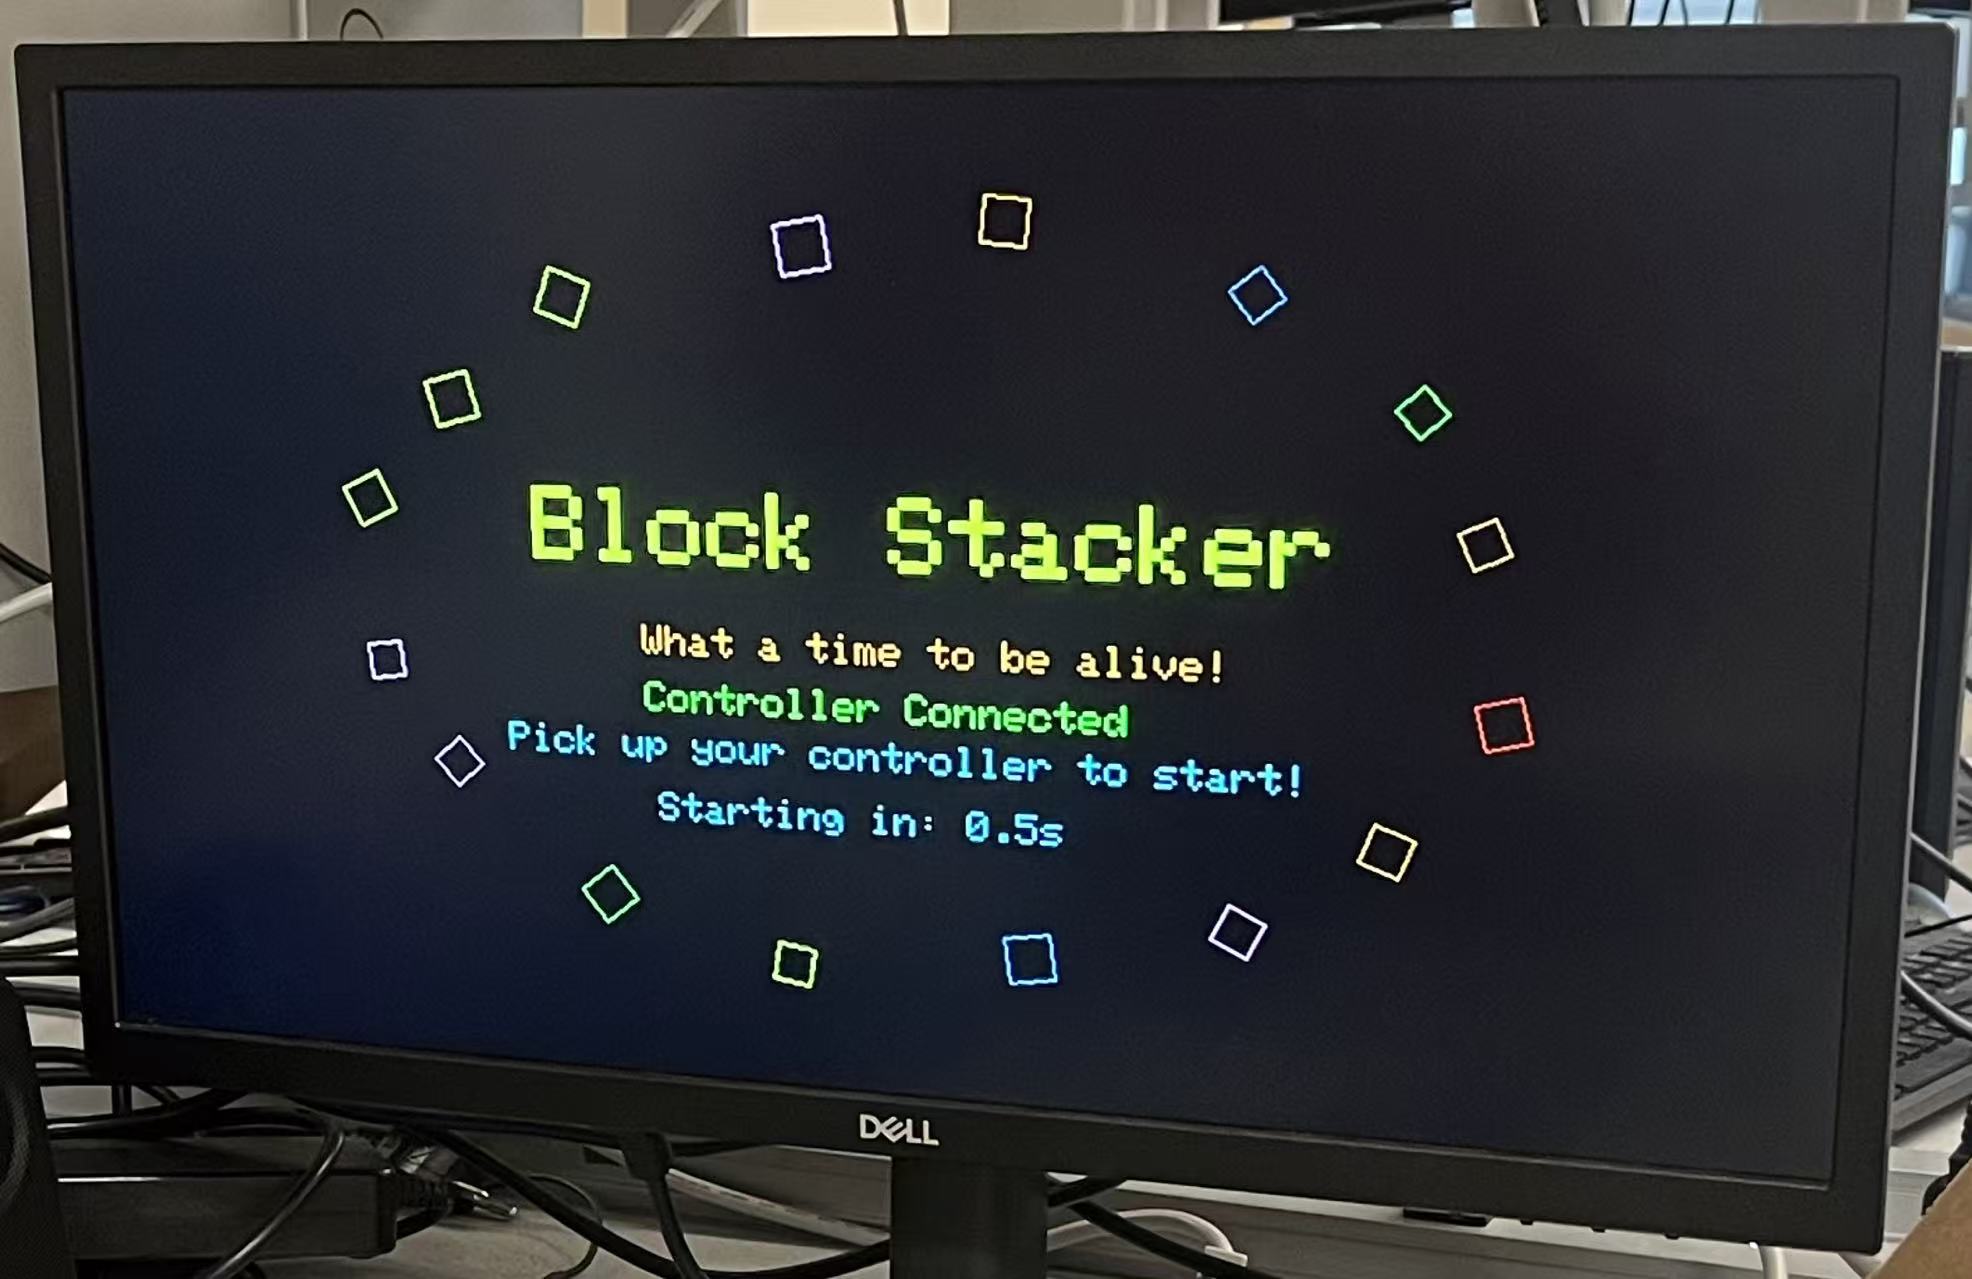
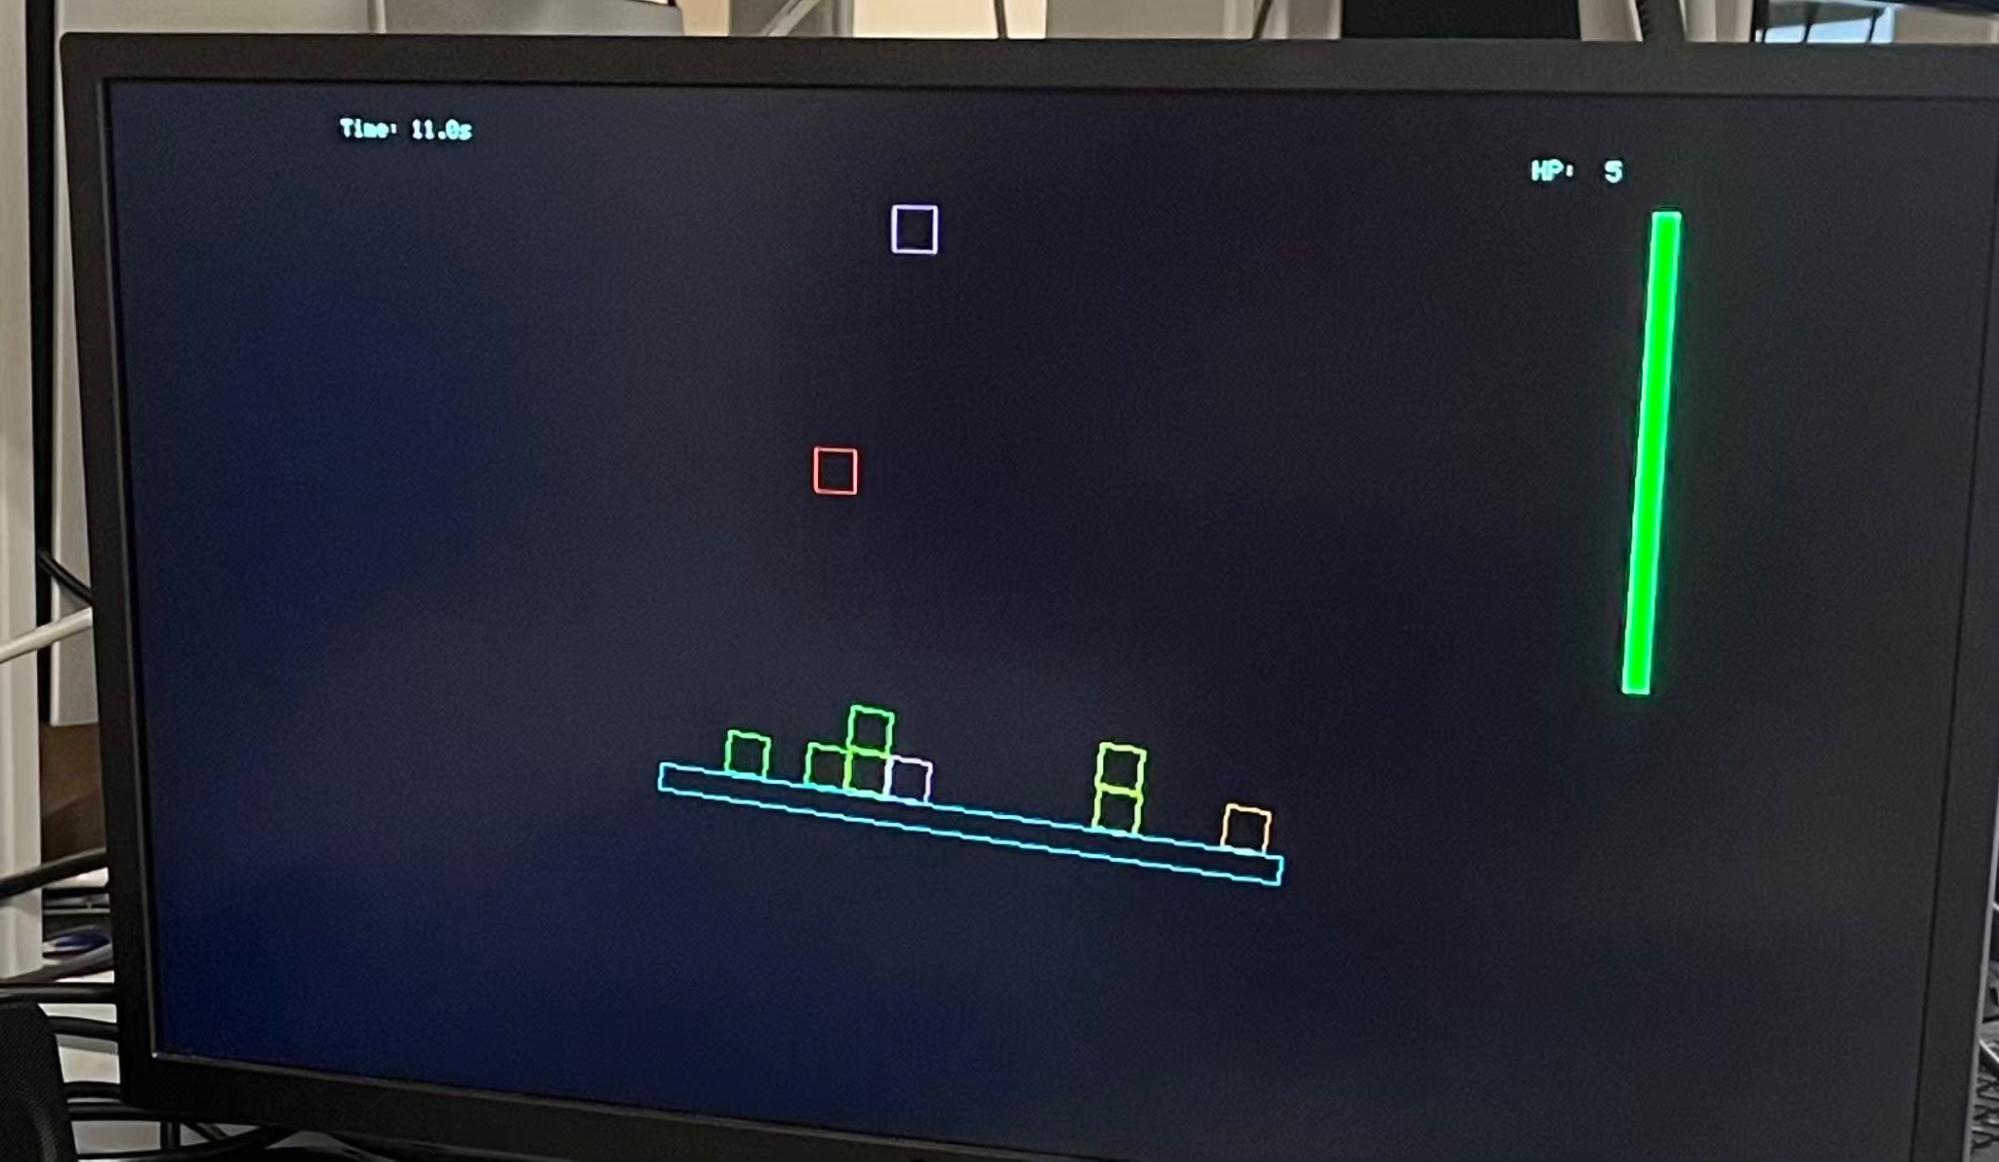
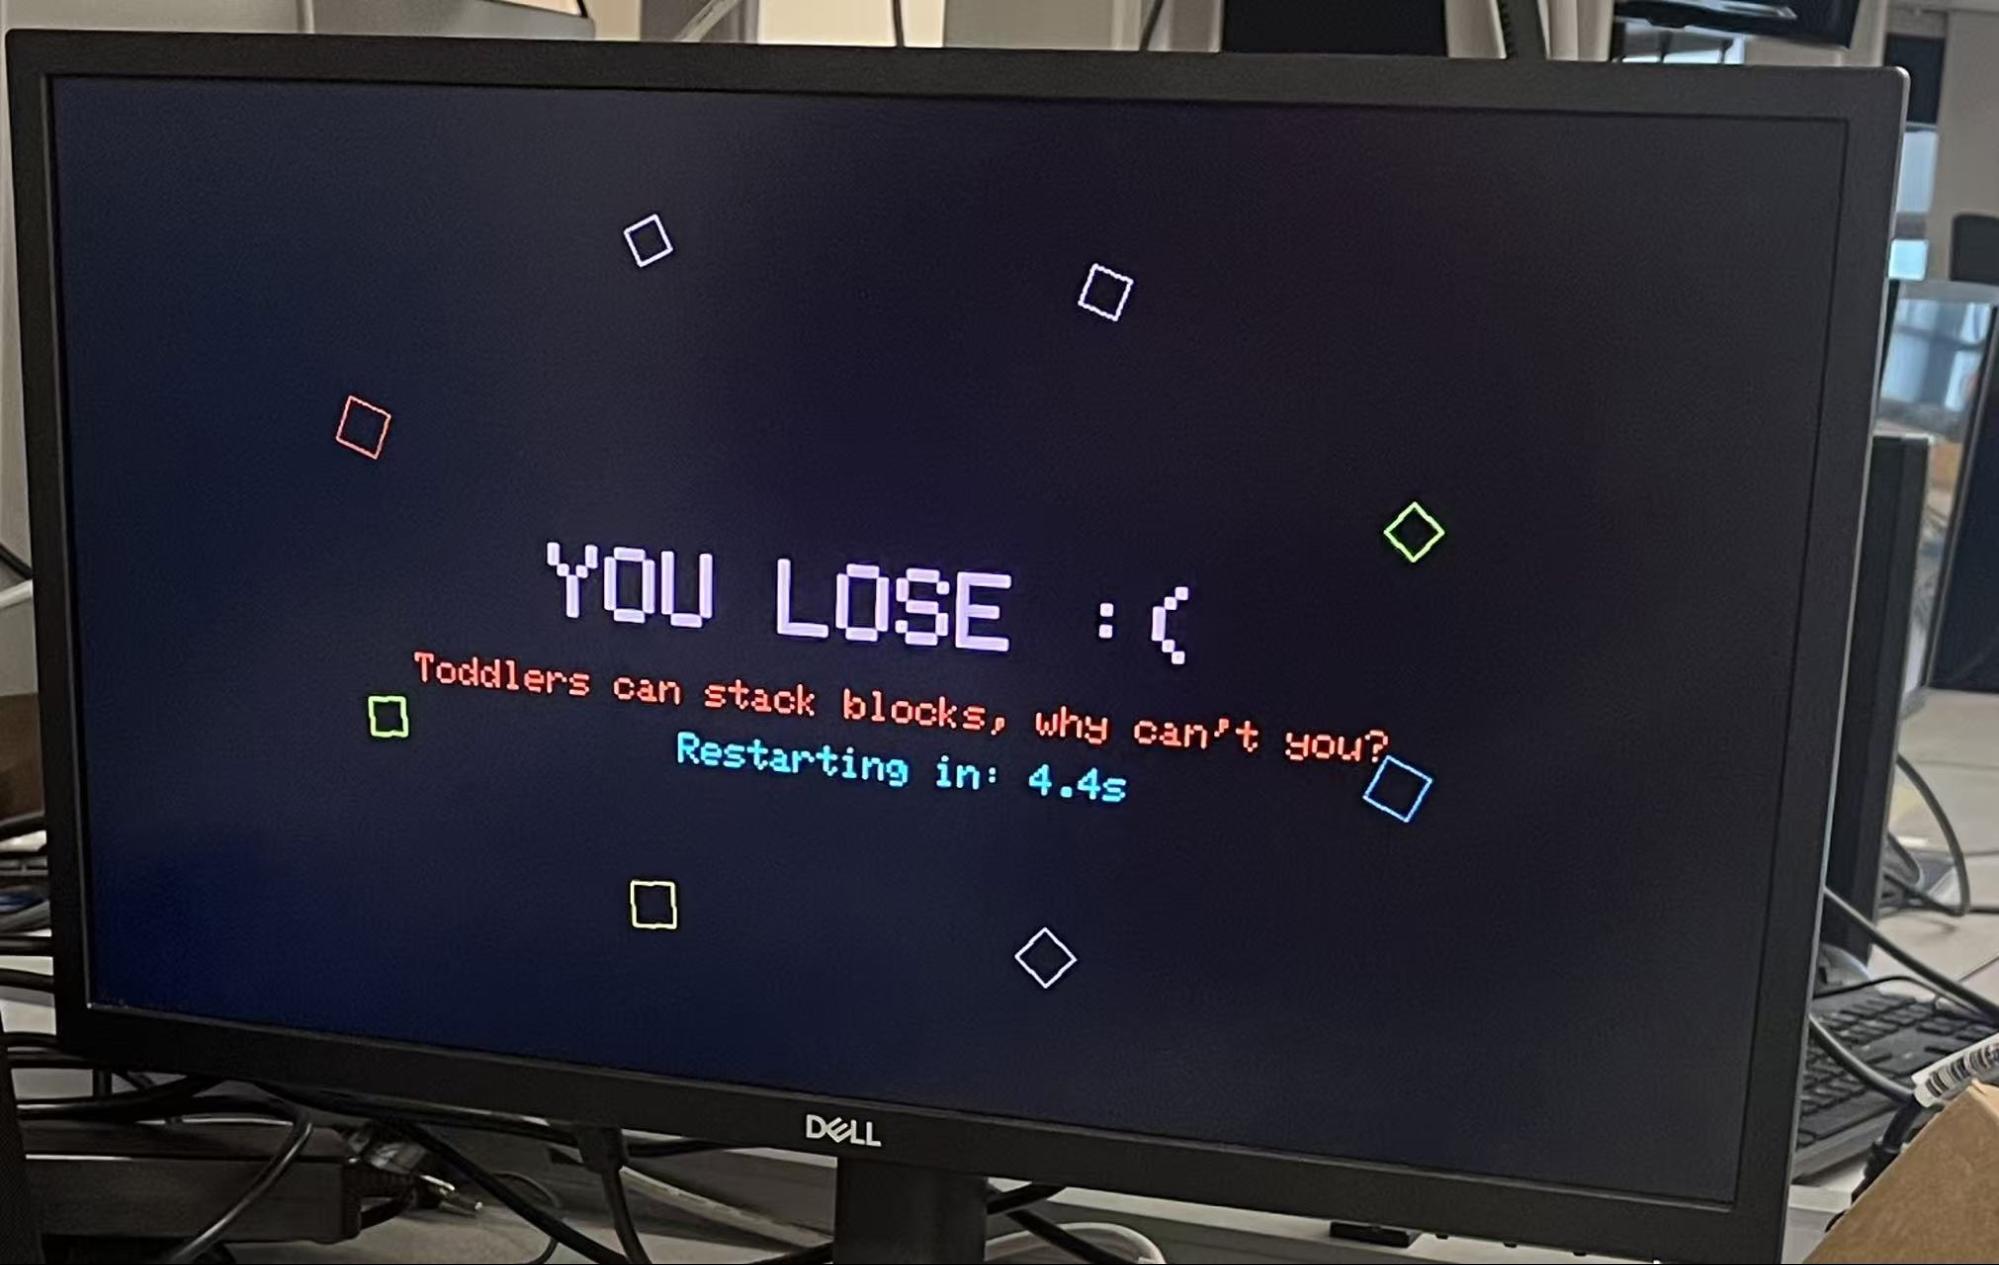
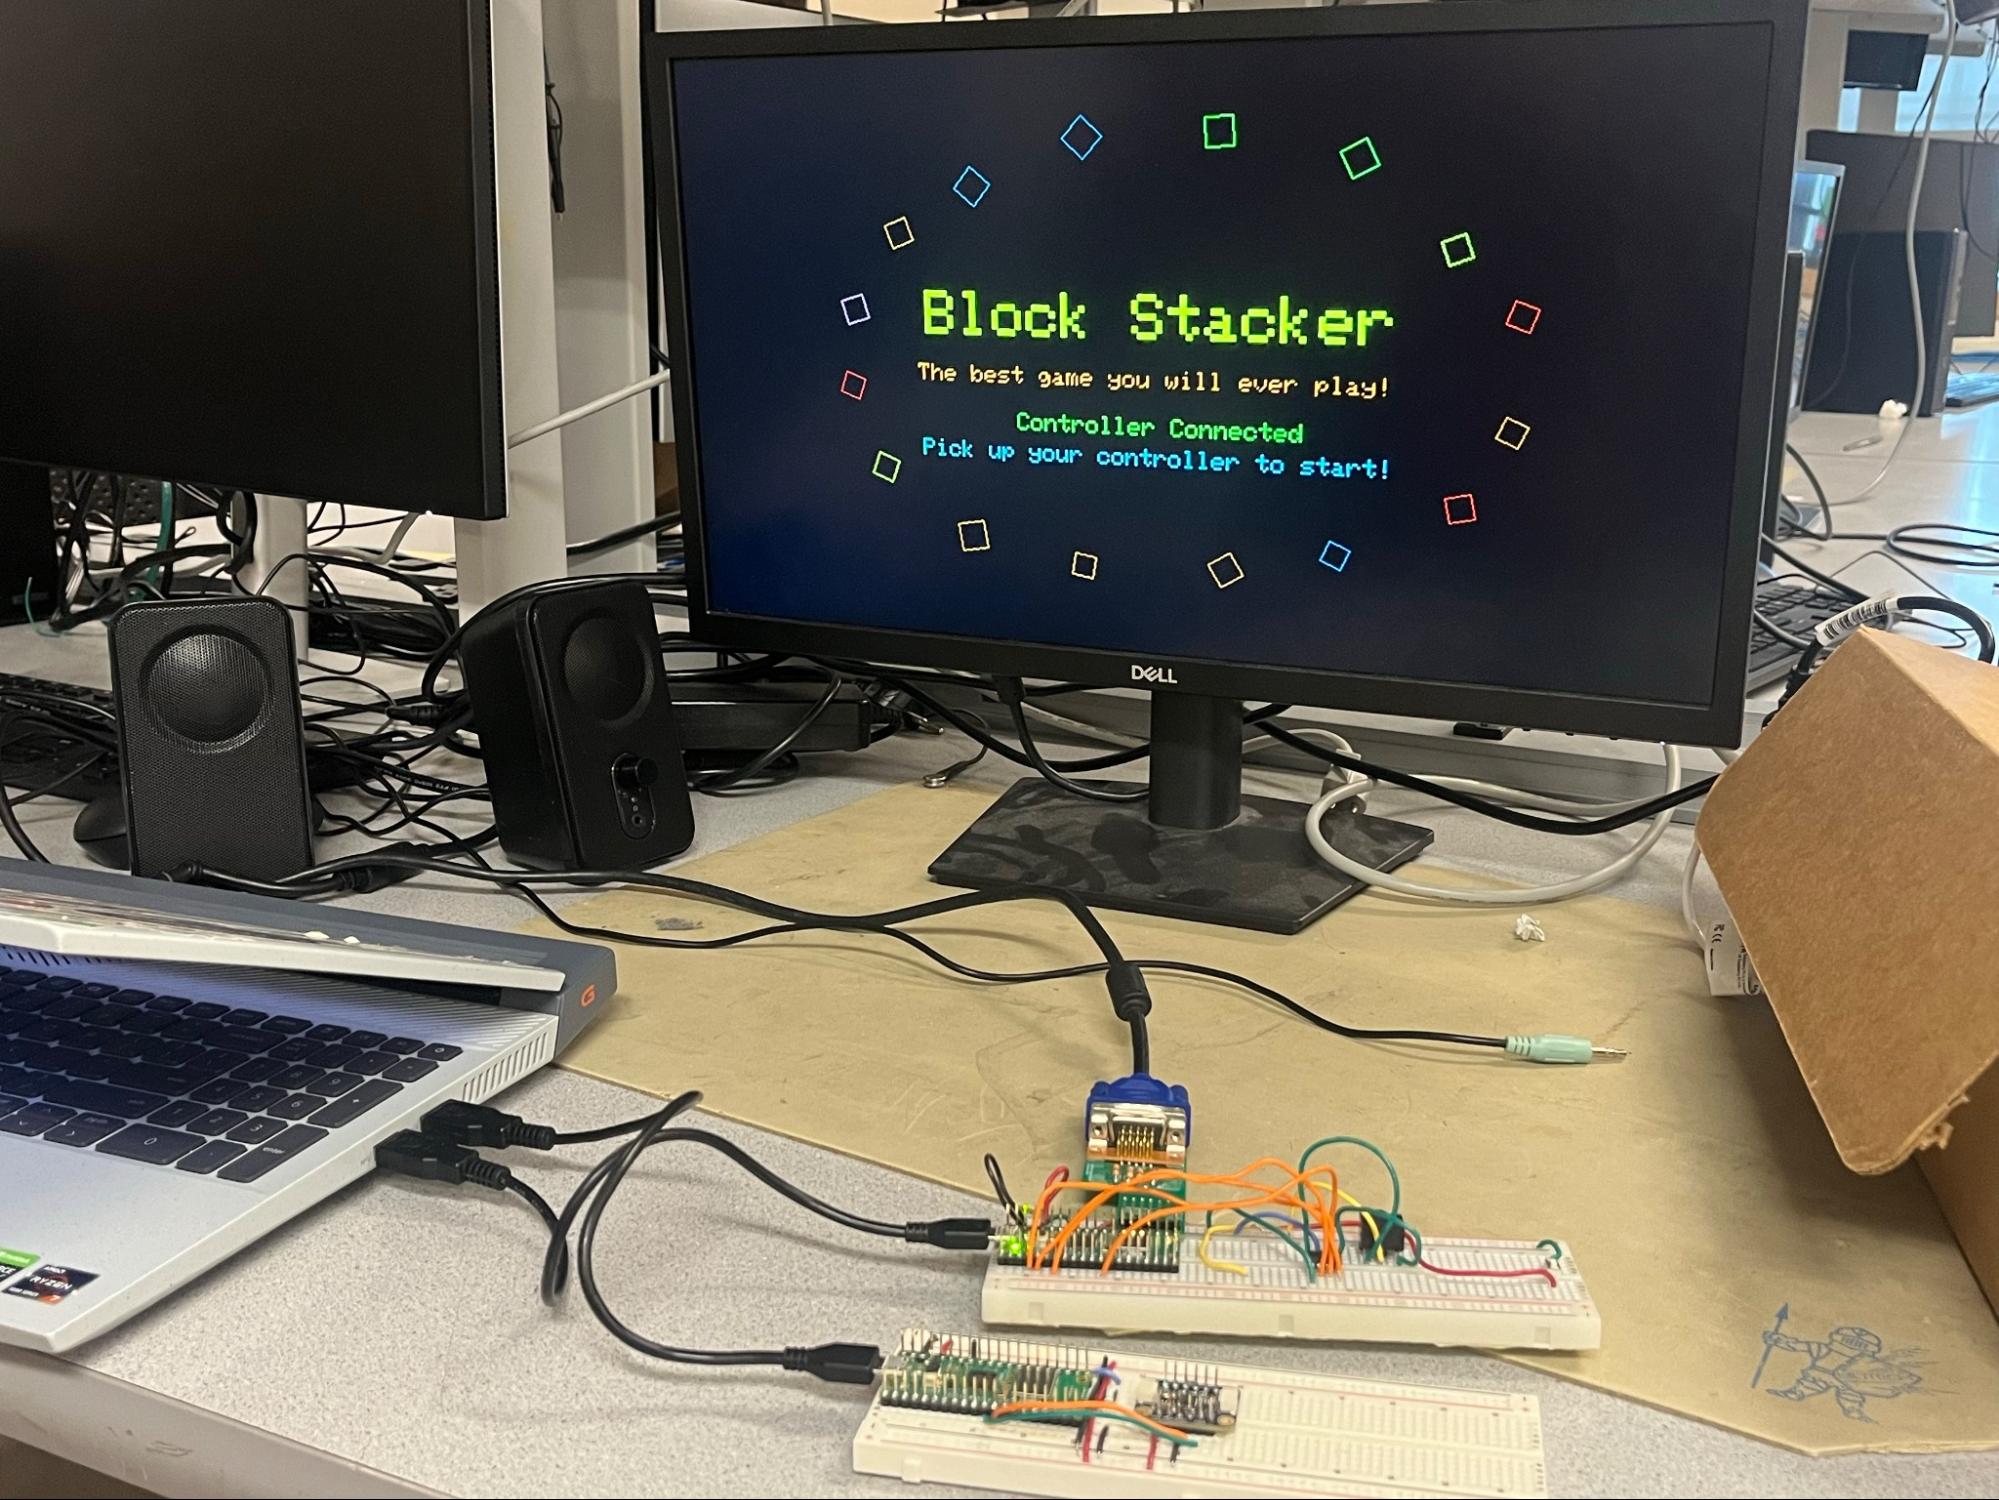
The game state is determined by the game machine to switch between the beginning screen, main gameplay screen, and the ending screen. An image of each of the rendered screens is shown below.
Title page
Game page
Ending page
To progress through the game, the VGA display cycles through these steps:
The rotation of decorative boxes shown in the beginning and end screen of the game uses the same trigonometry functions. Decorative boxes are placed around the screen in a circular manner with a drift and spin rate defined in the struct.
Physics updates
The main physics animation happens in the physics_step() function which controls the update defined by a 16000 microsecond interval. The update include the following main steps while using the math previously discussed:
Health points
The game is designed to end when the predefined “health point” counter reaches zero. As previously explained, the grid shifts on the board by an offset; when a column reaches the edge of the board, the program calls remove_grid_cell() for every cell contained within it, each decrementing the health point count by 1 as it is removed.
VGA rendering
VGA rendering is carried in the VGA protothread, with VSYNC to adjust the frame drawing timing. For optimization of rendering, the border line of the board and the boxes in the previous screen are individually covered by black to “erase”, and redrawn after the physics update step. The frame rate is kept at 60FPS.
Method summary
Below is a summary of all the functions implemented in the software.
METHOD | PURPOSE |
rand_unit | Return a randomized floating-point number uniformly distributed in [0, 1]. |
drawRotatedRectOutline | Draw a rectangle rotated by a given cosine and sine. |
hideBoardPaddle | Erase the rotating board by drawing the outline in black. |
drawBoardPaddle | Draw the (rotated) board as a rotated rectangle outline. |
drawBoxRotated | Draw a (rotated) box outline at a specified position. |
drawBoardBounds | Draw screen boundary lines. |
grid_cell_world_center | Compute the world-coordinate center of a cell. |
remove_grid_cell | Remove a cell and decrement health points. |
rand_color | Return a random color from a predefined color selection set. |
shift_grid | Shift the entire grid and remove blocks that slide off the board. |
clear_grid | Clears all grid cells. |
clear_falling | Deactivates all boxes falling. |
physics_init | Initializes physics for board, boxes, timers, and other game state variables. |
spawn_falling_box | Spawns a new falling block at a random horizontal position above the board. |
cleanup_grid | Removes boxes that are outside the screen. |
physics_step | Advance the physics simulation by one defined timestamp. |
get_random_greeting_phrase | Select a greeting phrase in the start screen. |
get_random_losing_phrase | Selects an ending phrase for the game-end screen. |
display_main_screen | Display the title screen elements and user prompts. |
display_losing_screen | Display the ending screen elements and user prompts. |
create_display_block | Create a decorative box with drift and spinning parameters. |
init_spinning_blocks | Initialize decorative boxes for the beginning and end screens. |
display_spinning_blocks | display decorative boxes for the appropriate state of the game. |
protothread_vga | Main protothread that controls VGA rendering for the game. |
set_tilt_angle | Updates the tilt angle through the input from the user. |
core1_entry | Launches the VGA protothread. |
main | Initializes hardware, multicore, and Bluetooth client. |
Hardware details
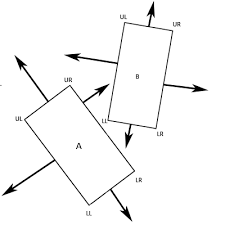
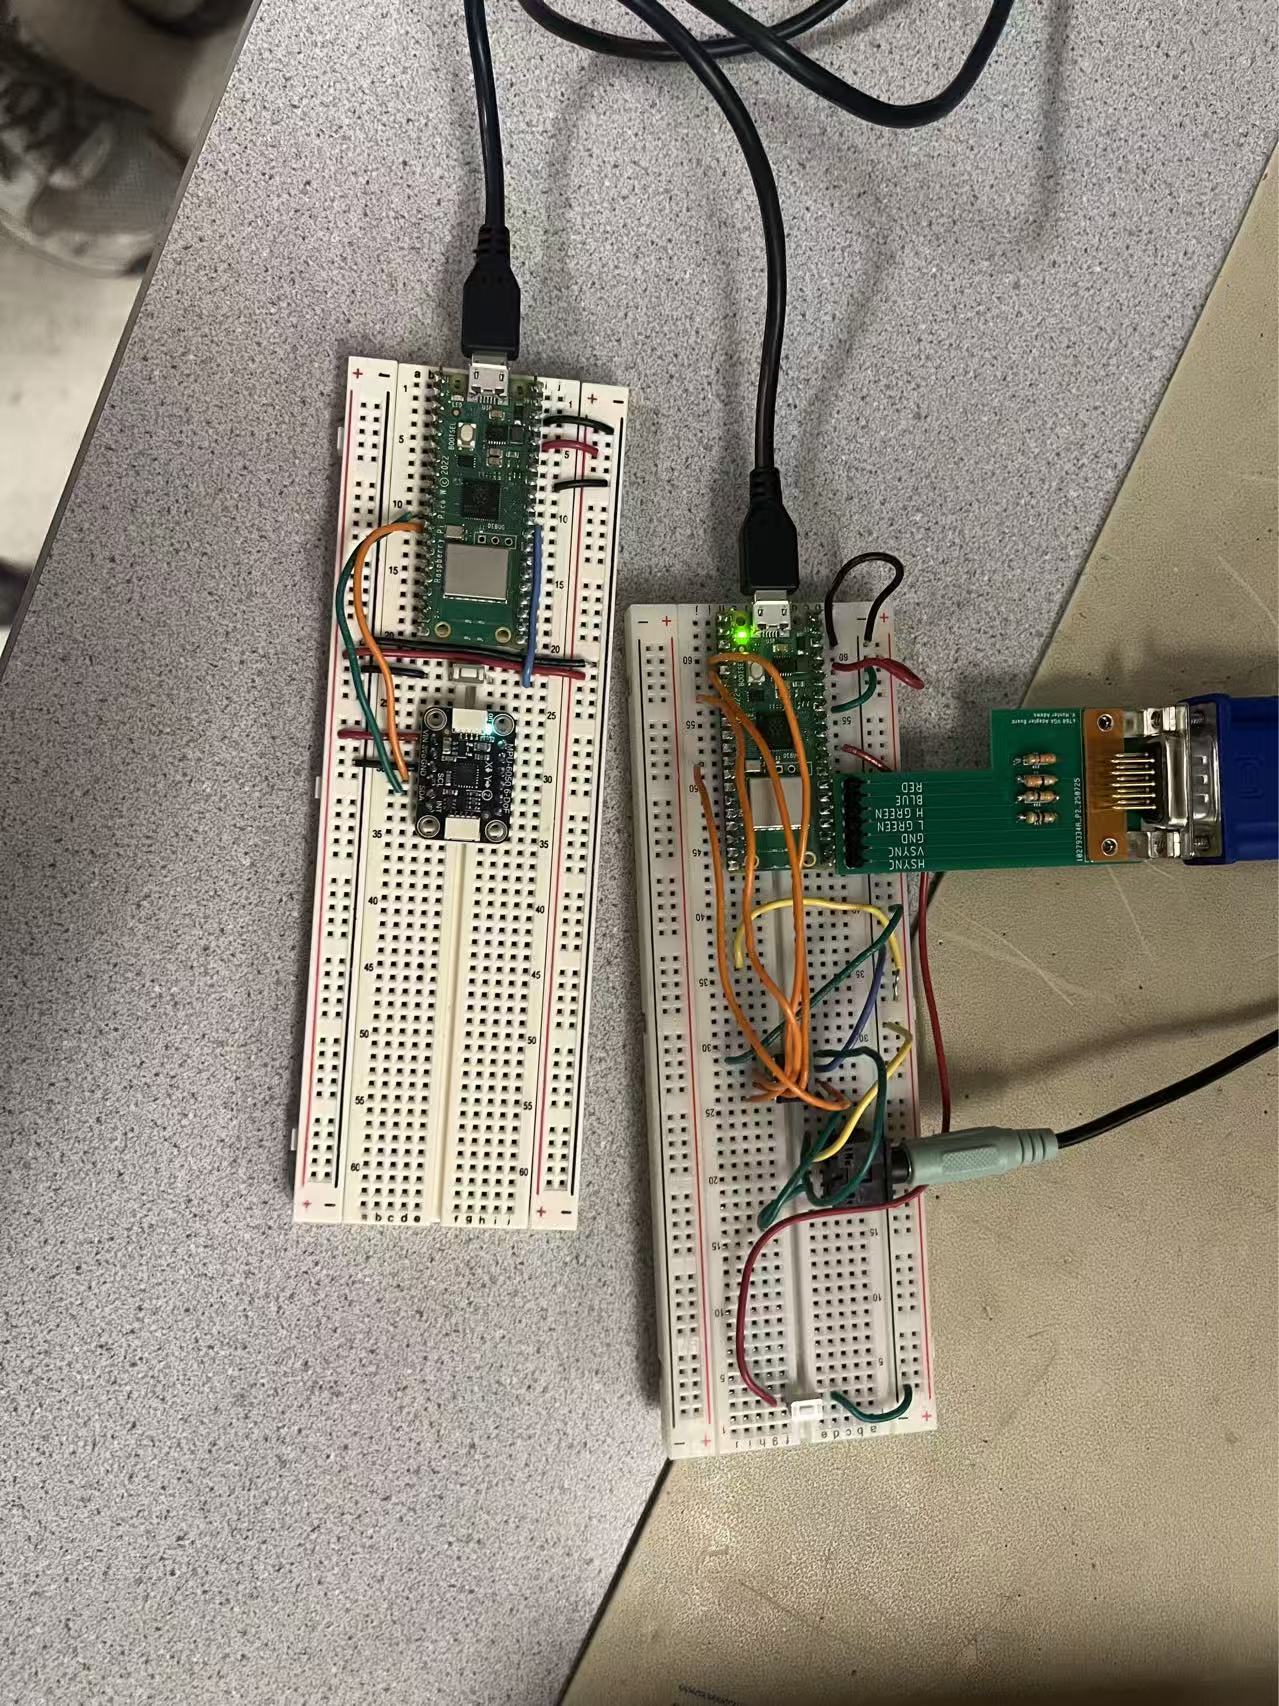
The hardware connection is fairly simple and shown in the figure below.
The Board on the left is held by the user as the controller handle, with an IMU that gives the tilt angle as the user input. The board on the right connects the VGA output and the DAC & audio jack for the background music. All parts connected follow the instructions from previous labs.
Bluetooth interface
To control the game, the tilt angle of the controller about the y-axis is tracked using the IMU, and this angle is then sent to the game device from the controller. To implement the Bluetooth connection, we first designed the controller to run as a Bluetooth peripheral device, implementing a custom GATT server with a single subscribable service and characteristic that exposes the tilt angle of the device. We used the nRF Connect application to debug this interface, designing it so that a GATT client could subscribe to our characteristic and receive notifications of changes to the tilt angle of the device every 100 milliseconds. Our implementation of the GATT server was based on the GATT server example provided in class.
Alongside our server, we implemented a Bluetooth GATT client on our game device, which we designed to automatically discover, connect to, and subscribe to our GATT server. We designed this client software based off of the GATT client example provided in class, and we configured it to directly update the board angle variable used in our game physics calculation each time a notification was received from the server. We then added logic to ensure that a stable connection between the server and client was established before allowing the game to start.
Alternative program design
An alternative game design approach that we tried, but that we eventually decided not to implement, was to simulate a box-stacking game with each box and the board as a 2D rigid body that could each collide and interact with each other in a physically realistic way. However, after trying several feasible libraries for this effort, we found that the resources available on the RP2040 weren’t sufficient for the prompt calculation and rendering of a realistic simulation, and as a result we chose to design our program to simulate less complex physics, feeling that the simpler physics implementation still performed well despite the lower complexity.
AI use
AI was used in this project to confirm the feasibility of possible alternatives to rigid-body based simulation, including the design currently used. The prompt is “(explanation for the current game logic with tetris-style stacking) will this game design make sense in the user interface?” AI was also used to help convert the equations shown earlier in this document into latex format so that they could be properly displayed and understood. All other aspects of the final game setup were integrated and tested manually by the team.
The video below gives a functional demonstration for the box stacking game, with visuals, background music, and input response.
The game is initially rendered at 60fps, slightly decreasing towards the end as the RP2040 is unable to handle the increase in calculations needed to display the increasing amount of stacked boxes. Other than this issue, the physics simulation, music, and user input from the controller accurately follow the execution of the code, with the user reporting a reasonable rate of response to the input. There is no safety hazard contained in the game.
In conclusion, we designed a box-stacking game with a stable rendering and physics simulation on RP2040 with reliable VGA output and bluetooth wireless control. The physics mode combining the continuous and discrete physics model ensured the game’s feasibility running on the microcontroller while rendering the game in a way that feels physically realistic to the user.
In the future, we may choose to implement richer gaming options and depth by allowing the user to change the physics parameters, such as friction, gravity, etc. We could also further optimize the VGA display math to allow better performance when rendering an increased amount of stacked boxes.
There is no IP concern or use of proprietary assets/code in this project; all software reused in this project is sourced from the public domain of the course website.
The group approves this report for inclusion on the course website.
The group approves the video for inclusion on the course youtube channel.
All code used for this project is contained within our Git Repository. All files used to design the controller are included in the Device_RPI directory, and all files used to design the game device are included in the Display_RPI directory. Both directories are built as RPI pico W projects and have the entry point of main.c.